10 minutes
Building my first mechanical keyboard
Introduction
I recently went down the rabbit hole that is mechanical keyboards and, even worse, attempted to build my own. This blog will show you some random dude’s journey to making his first mechanical keyboard and avoiding some of my mistakes. I hope you enjoy the blog, and thank you for visiting the site.
Why build vs. buy
Why would you build a keyboard? I mean, you could buy one, right? That is correct, and there’s nothing wrong with buying a keyboard or mechanical keyboard pre-assembled. In fact, two other keyboards I own came pre-assembled. One is the Keyboardio Atreus (still use this for travel) and the Iris keyboard I purchased from Keebio. Both are excellent, and I still use them today.
Even though I purchased two previous sets, I wondered if I could build one myself. I compare it to the same journey of putting a puzzle together, a Lego set, or a Gundam kit. Making something and seeing it come together brings a vast amount of joy.
Why Ortholinear
If you clicked on the previous links for the two keyboards mentioned above, you might wonder, “Why do those keyboards look so weird?” Fair question. These keyboards use an ortholinear layout where all the keys are the same size and have a uniform grid vs. a staggered layout found in traditional keyboards. The thought being this replicates the natural movement of our fingers. However, from my reading, there isn’t any evidence that this improves the typing experience or leads to fewer wrist injuries.
Why split
If you click on the Iris keyboard link, you may notice that it’s split into two pieces. The primary benefit here, since we have two unique pieces, we can rotate them to align with the natural resting position of our wrists vs. angling our wrists inward to align with a traditional staggered layout. The video below goes over all of this and more in excellent detail.
Picking the right keyboard
I was now set on a split keyboard with an ortholinear layout. This is where it gets fun or tricky. There are many options for mechanical keyboards, and any portion of the build can be customized to fit your needs. The layout, materials, key switches, keycaps, and colors for everything. It can get overwhelming very fast.
I had some general points to follow to make the selection process manageable. This is in no particular order.
- Wood case or at least wood-filled filament option
- Tactile switches
- Split layout
- Compact
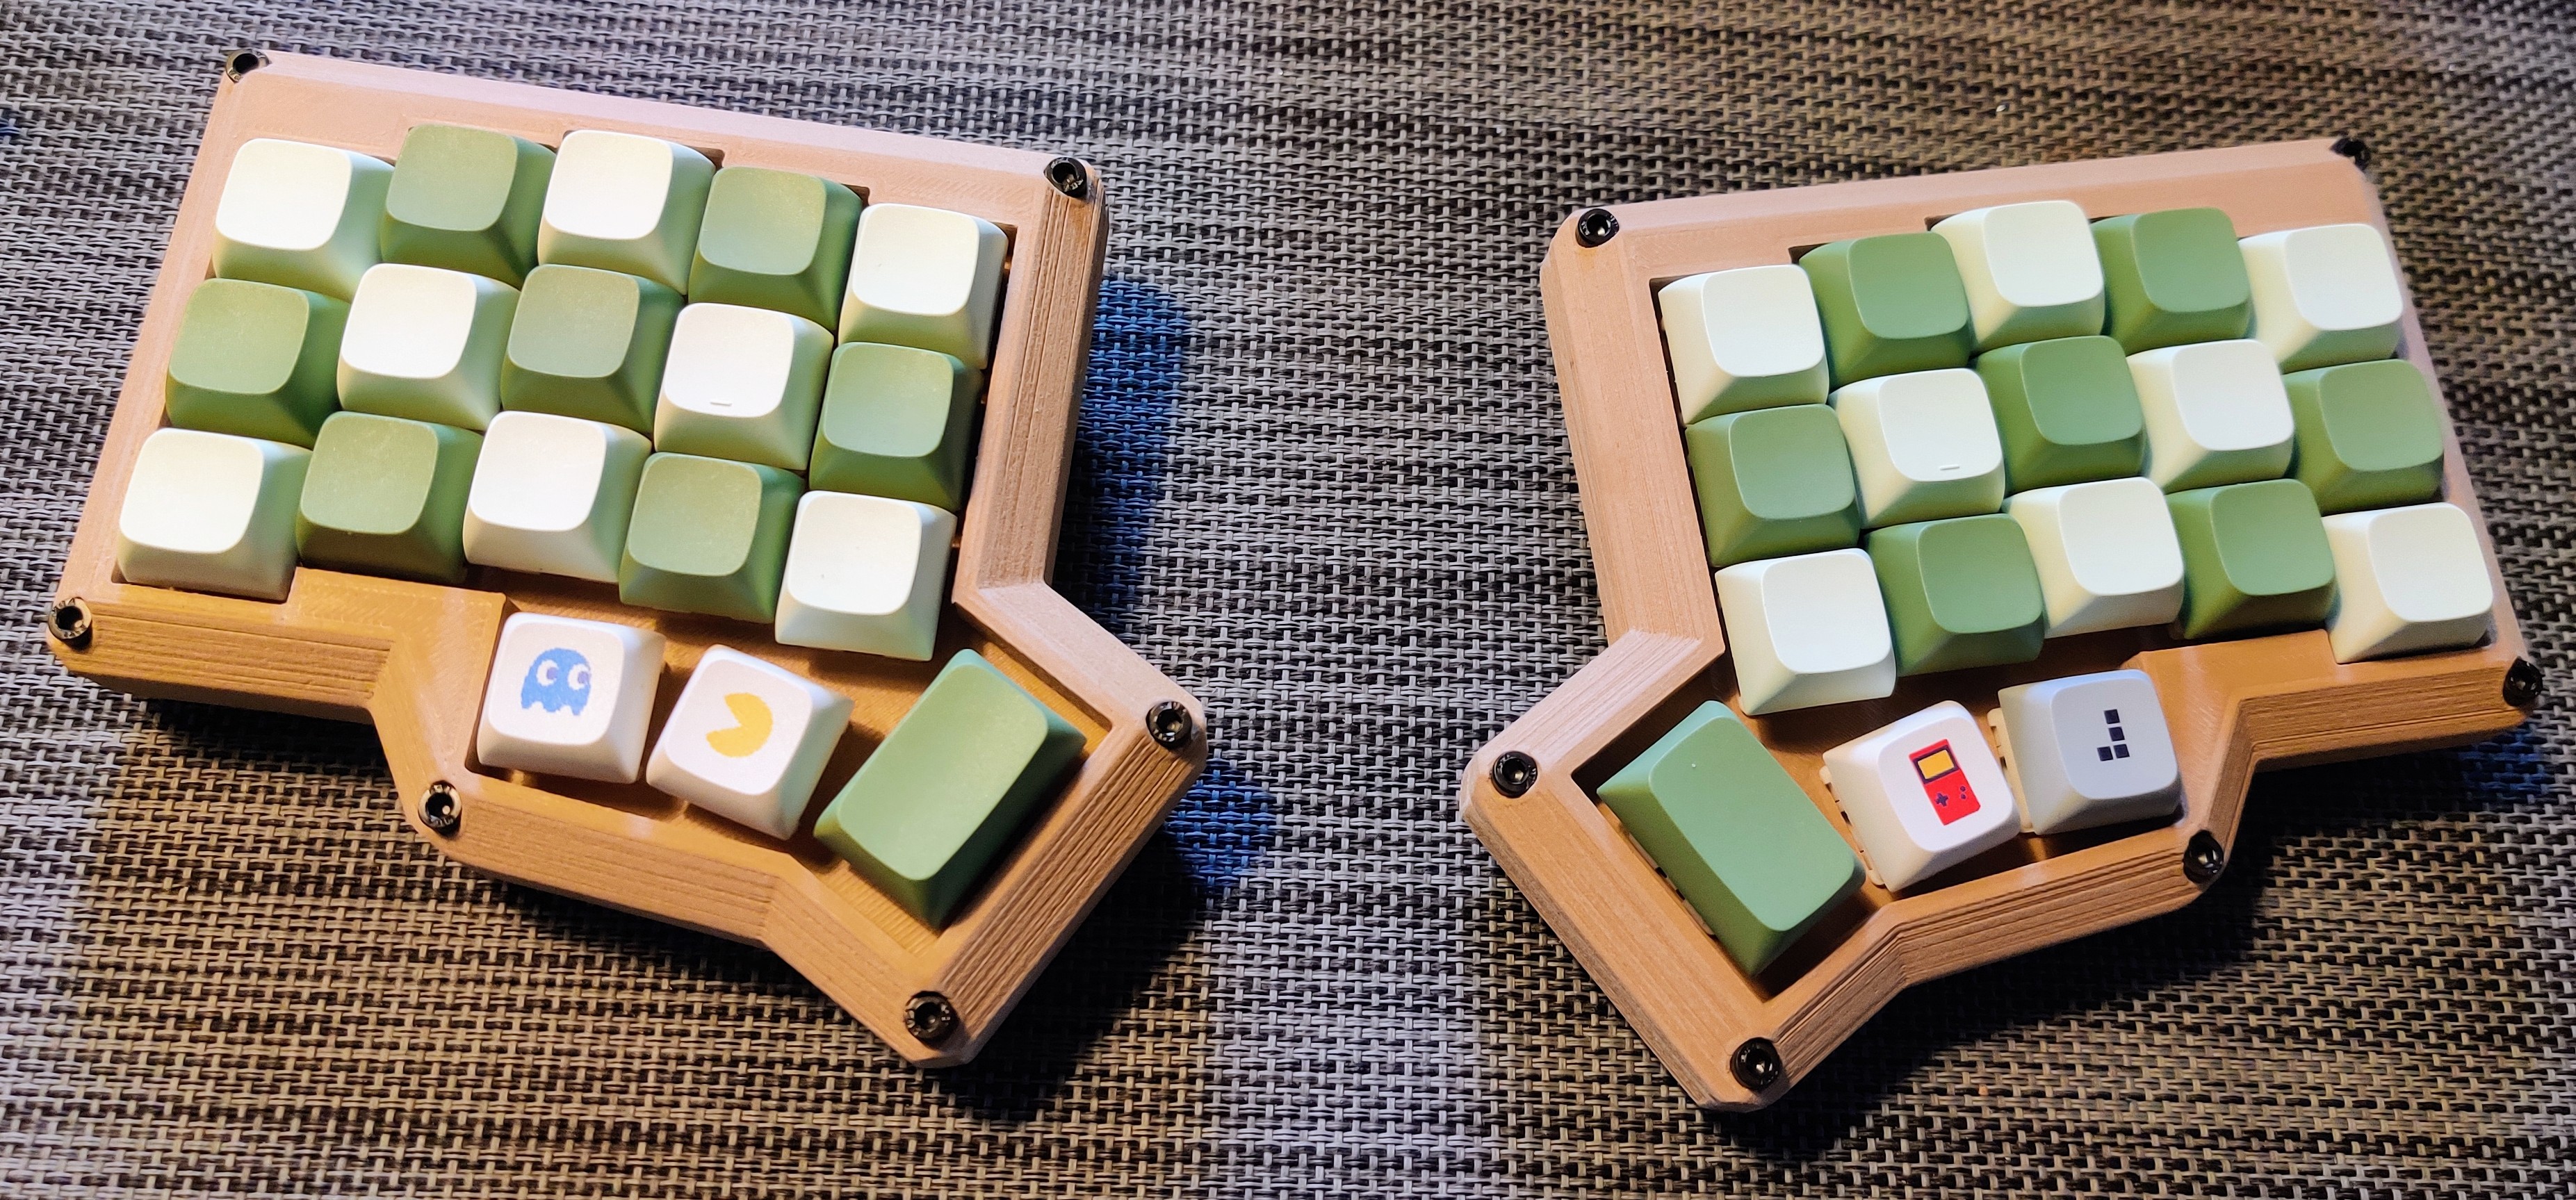
I don’t remember how I found my final choice, but I’m happy I did. Have you ever found a thing that makes you say, “This fits me.” When I saw the Minidox for the first time, I knew that was the keyboard I wanted to build. The Minidox is a more compact version of the popular ErgoDox. The PCB for the Minidox was created by That-Canadian, and I can’t thank them enough for making this free and open source for the community.
Assembling the required tools
I’ll provide links to the items I used but feel free to source what works for you. You may have some items that I didn’t have when I started. I’ll include some optional pieces as well.
- Soldering iron kit (Highly recommend)
- PCB and electronics from Profet Keyboards
- Any switch you like, I went with Glorious Pandas pre-lubed
- Any MX style switches you prefer
- Case STL files, printed with treatstock
- M3 screws for the case
- TRRS cable
The parts above are what I would consider required. Since I was going down this route, I wanted to see if I could improve the sound of the keyboard as much as possible. The items below are optional.
- Replacement USB-C Pro Micro for the main side (left). The right side continues to use the micro USB that comes from Profet Keyboards.
- Keyboard PE switch pads for sound dampening.
- Neoprene roll for more sound dampening and to fill in the case.
- Something to practice soldering.
Practice, practice, and more practice
The soldering practice item above is optional, but it helped me tremendously. I last soldered eight years ago, and for many, this may be your first time looking at or handling a soldering iron. If I was going to do this, I didn’t want the keyboard PCB to be what I practice on. If you like to live dangerously, then go right ahead.
Getting started
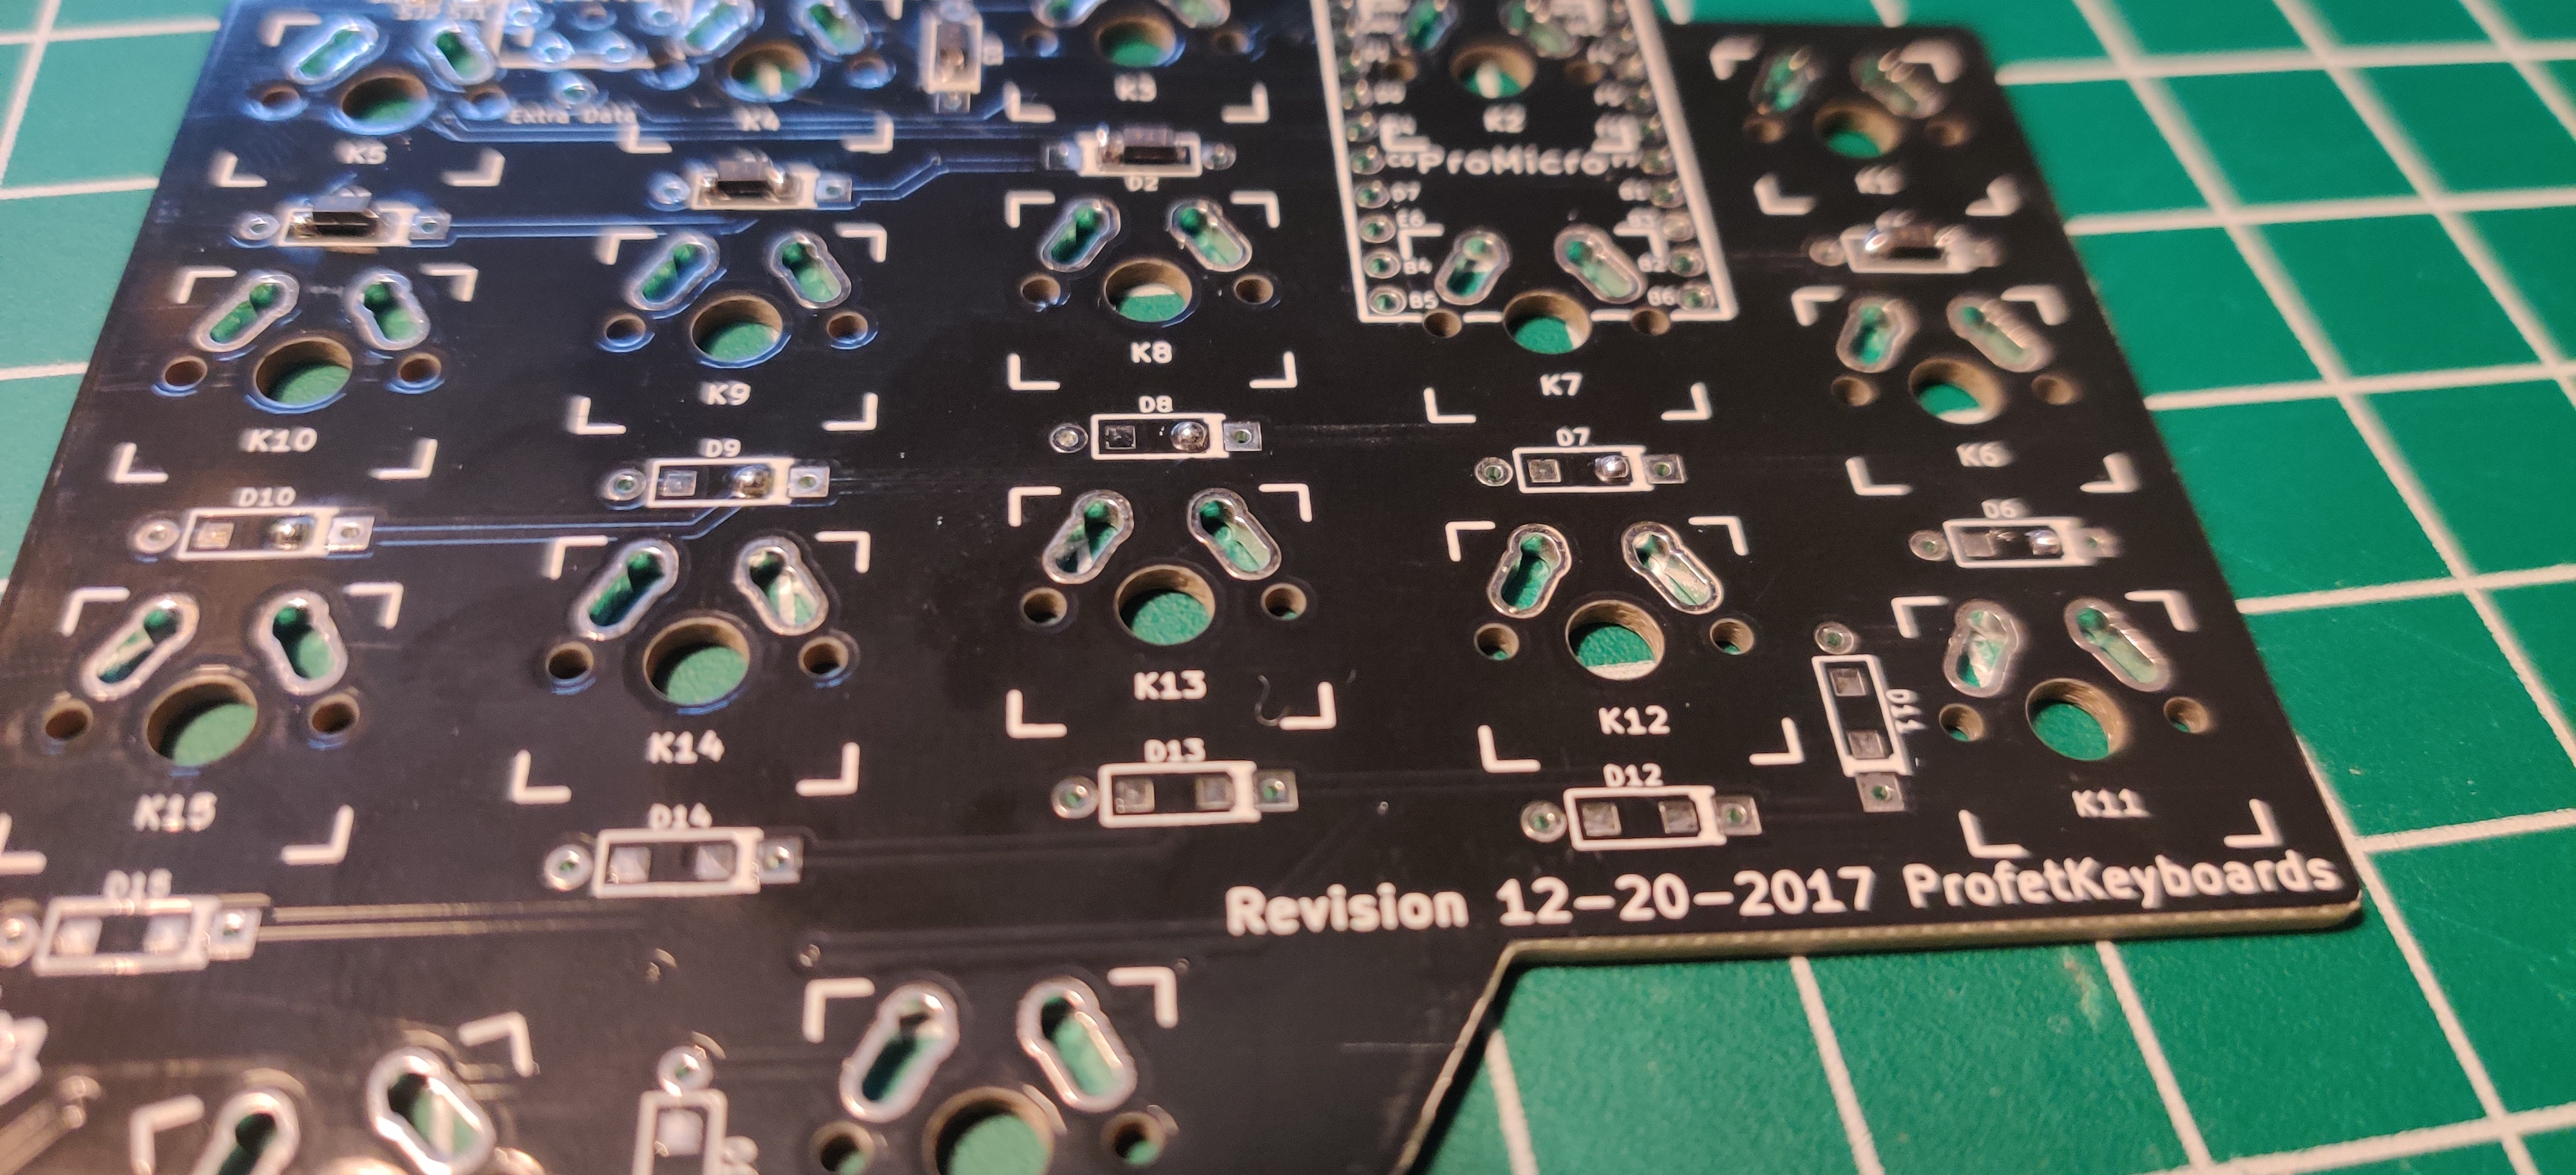
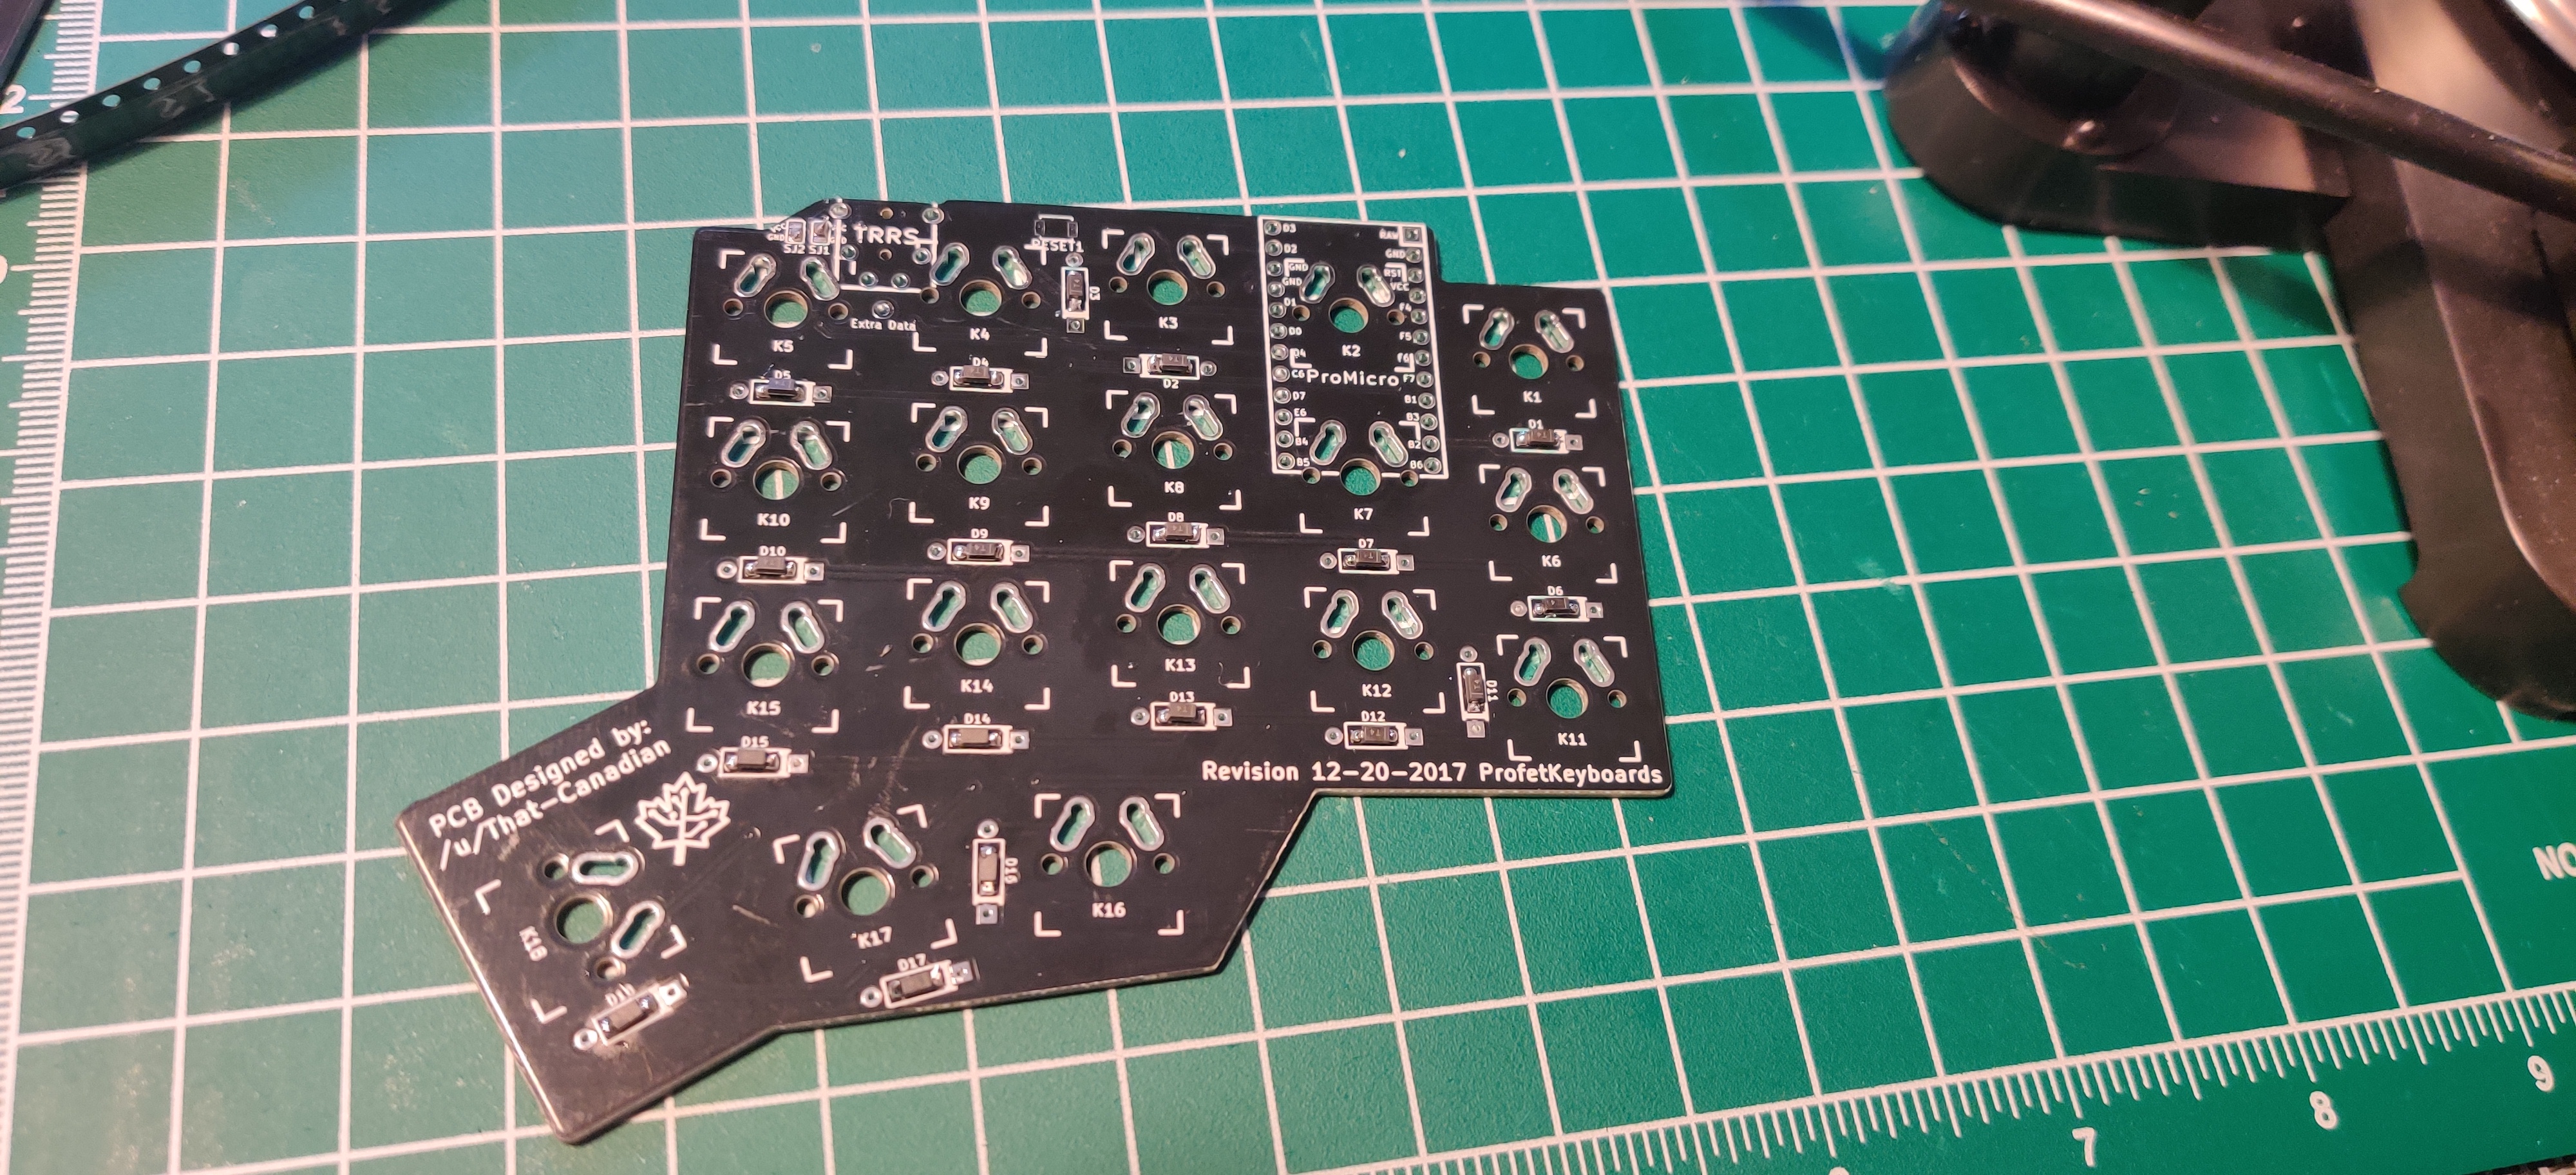
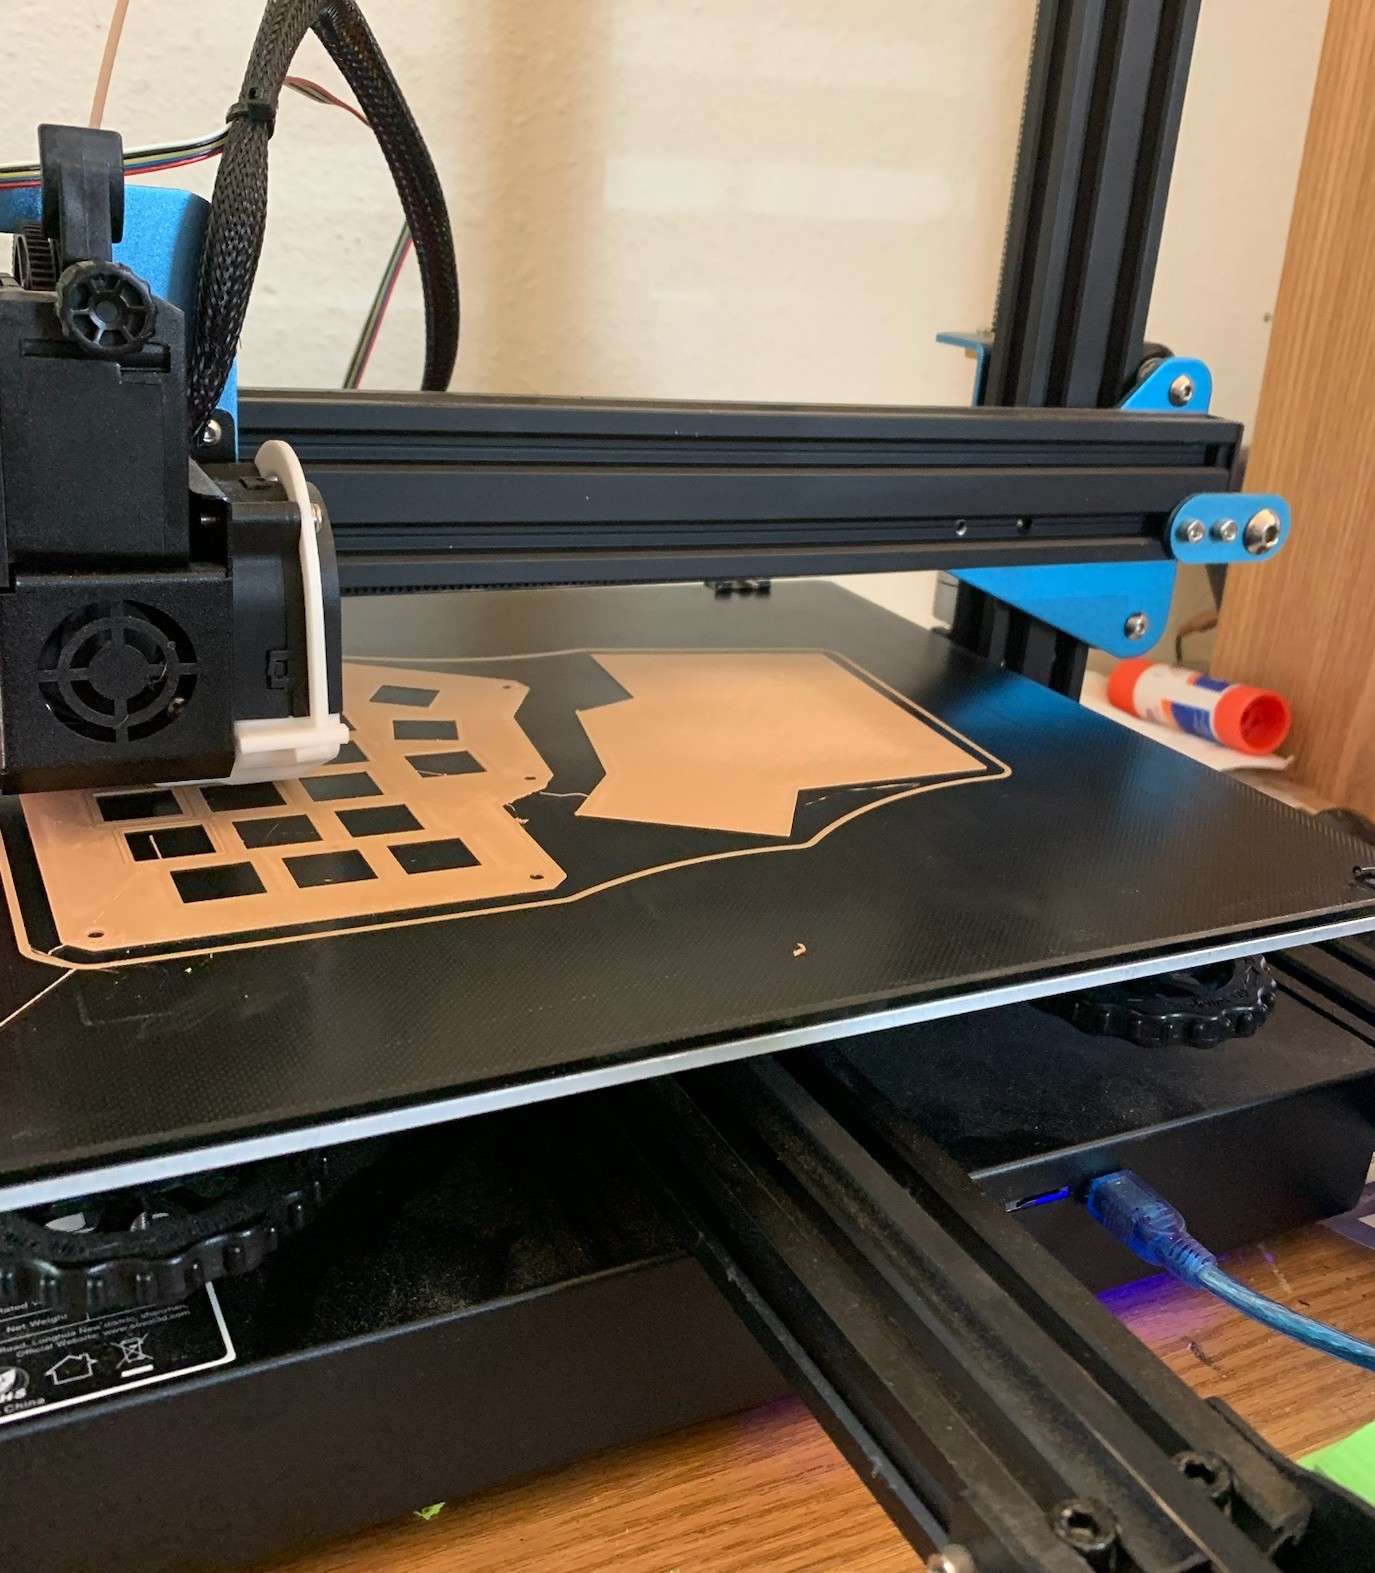
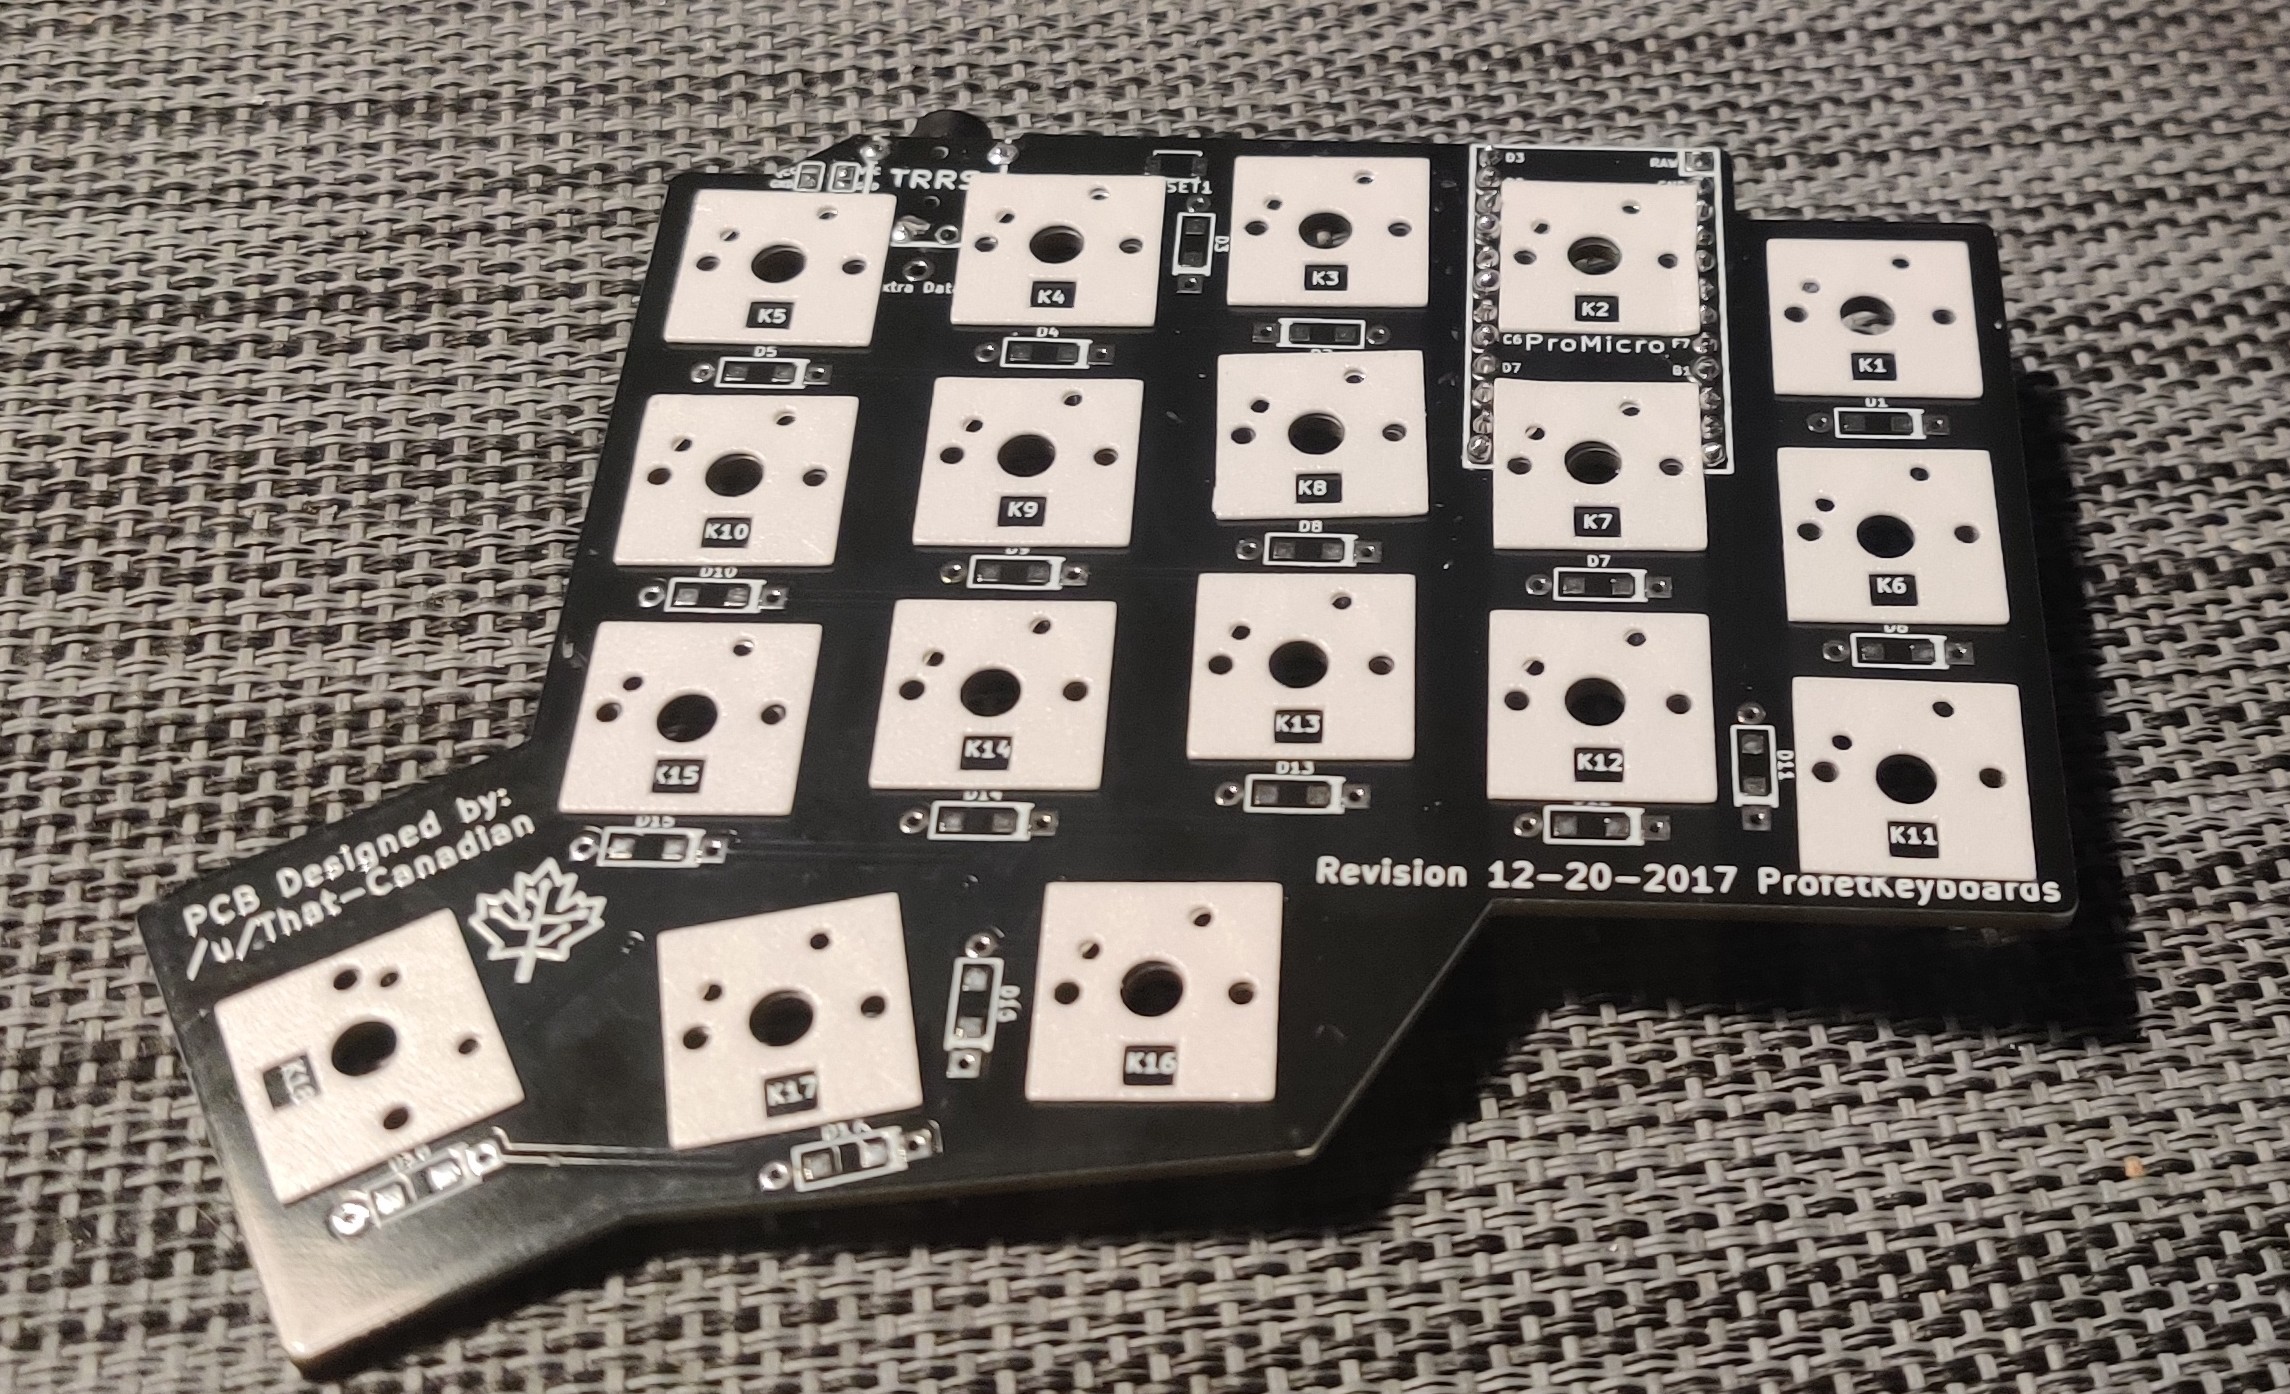
I leveraged the build guide by That-Canadian to complete this board. With everything in hand, I started soldering all the main components; diodes, TRRS jacks, and controllers. The image below is one of the few I captured in this build. Take note of how small those diodes are. If you have trouble focusing on small items, I recommend getting a desk magnifying glass or headset unit. The build guide mentions that the diodes can go on the top or the bottom of the PCB. I recommend you install them on the bottom. In case something doesn’t work right or you need to replace a non-working diode.
Flashing QMK firmware
Now that all of the diodes are in. This is a great time to flash the controllers before mounting them on the PCB. This build uses QMK to build and flash the firmware on the controllers. There’s a GUI interface for folks on Windows or Mac. I use a Linux machine as my daily driver and went with the command-line route.
Set a Python virtual environment to install dependencies.
python3 -m venv venv
source venv/bin/activate
pip3 install qmk
qmk setup
I leveraged all the default options during the setup stage. Although you may need to install additional dependencies on Linux, QMK should warn you if there’s a missing dependency.
You can test whether QMK is ready by running the qmk doctor command. You can also attempt to compile a keymap.
qmk compile -kb maple_computing/minidox/rev1 -km default
This is all great, but here’s something that took me a little while to figure out. By default, QMK will try to flash a controller compatible with caterina, at least for the Minidox. Please read the documentation of your controller to see what bootloader is available. The USB C Pro Micro I linked earlier runs the DFU bootloader. This required one change in the keyboard’s rules.mk file.
That sounds great but I had no idea where that file lived. Again, I’m just a new user of all this tooling and all the documentation seems to assume you know where this lives. If you followed the default install steps for QMK, this will clone down the QMK repository to your main directory.
cat qmk_firmware/keyboards/maple_computing/minidox/rules.mk
# Build Options
#   change yes to no to disable
#
BOOTMAGIC_ENABLE = no       # Enable Bootmagic Lite
MOUSEKEY_ENABLE = yes       # Mouse keys
EXTRAKEY_ENABLE = yes       # Audio control and System control
CONSOLE_ENABLE = no         # Console for debug
COMMAND_ENABLE = yes        # Commands for debug and configuration
NKRO_ENABLE = no            # Enable N-Key Rollover
BACKLIGHT_ENABLE = no       # Enable keyboard backlight functionality
RGBLIGHT_ENABLE = no        # Enable keyboard RGB underglow
AUDIO_ENABLE = no           # Audio output

SPLIT_KEYBOARD = yes

DEFAULT_FOLDER = maple_computing/minidox/rev1
The required setting for this controller is to add BOOTLOADER = atmel-dfu to the rules.mk file.
Now if we follow the required steps, we should see a new option for the bootloader to try and flash.
- Compile your keymap of choice
- run
qmk flash -kb maple_computing/minidox/rev1 -km default - Plug in the controller USB to your PC
- Either hit the reset button if installed or use tweezers on the reset and ground pins.
qmk flash -kb maple_computing/minidox/rev1 -km default
Ψ Compiling keymap with gmake --jobs=1 maple_computing/minidox/rev1:default:flash


QMK Firmware 0.20.5
Making maple_computing/minidox/rev1 with keymap default and target flash

avr-gcc (GCC) 5.4.0
Copyright (C) 2015 Free Software Foundation, Inc.
This is free software; see the source for copying conditions.  There is NO
warranty; not even for MERCHANTABILITY or FITNESS FOR A PARTICULAR PURPOSE.

Size before:
   text    data     bss     dec     hex filename
      0   19794       0   19794    4d52 maple_computing_minidox_rev1_default.hex

Compiling: quantum/command.c                                                                        [OK]
Linking: .build/maple_computing_minidox_rev1_default.elf                                            [OK]
Creating load file for flashing: .build/maple_computing_minidox_rev1_default.hex                    [OK]
Copying maple_computing_minidox_rev1_default.hex to qmk_firmware folder                             [OK]
Checking file size of maple_computing_minidox_rev1_default.hex                                      [OK]
 * The firmware size is fine - 19794/28672 (69%, 8878 bytes free)
Flashing for bootloader: atmel-dfu
Bootloader not found. Make sure the board is in bootloader mode. See https://docs.qmk.fm/#/newbs_flashing
 Trying again every 0.5s (Ctrl+C to cancel)...
Ultimately, I settled on a keymap variation of the one posted by khitsule.
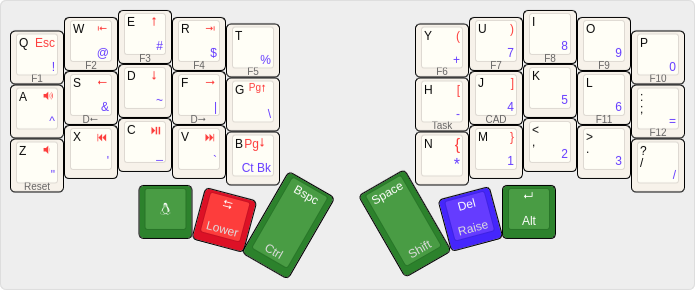
The color coding references what the keys will do depending on whether we hold the lower or raise key down.
Why isn’t this working
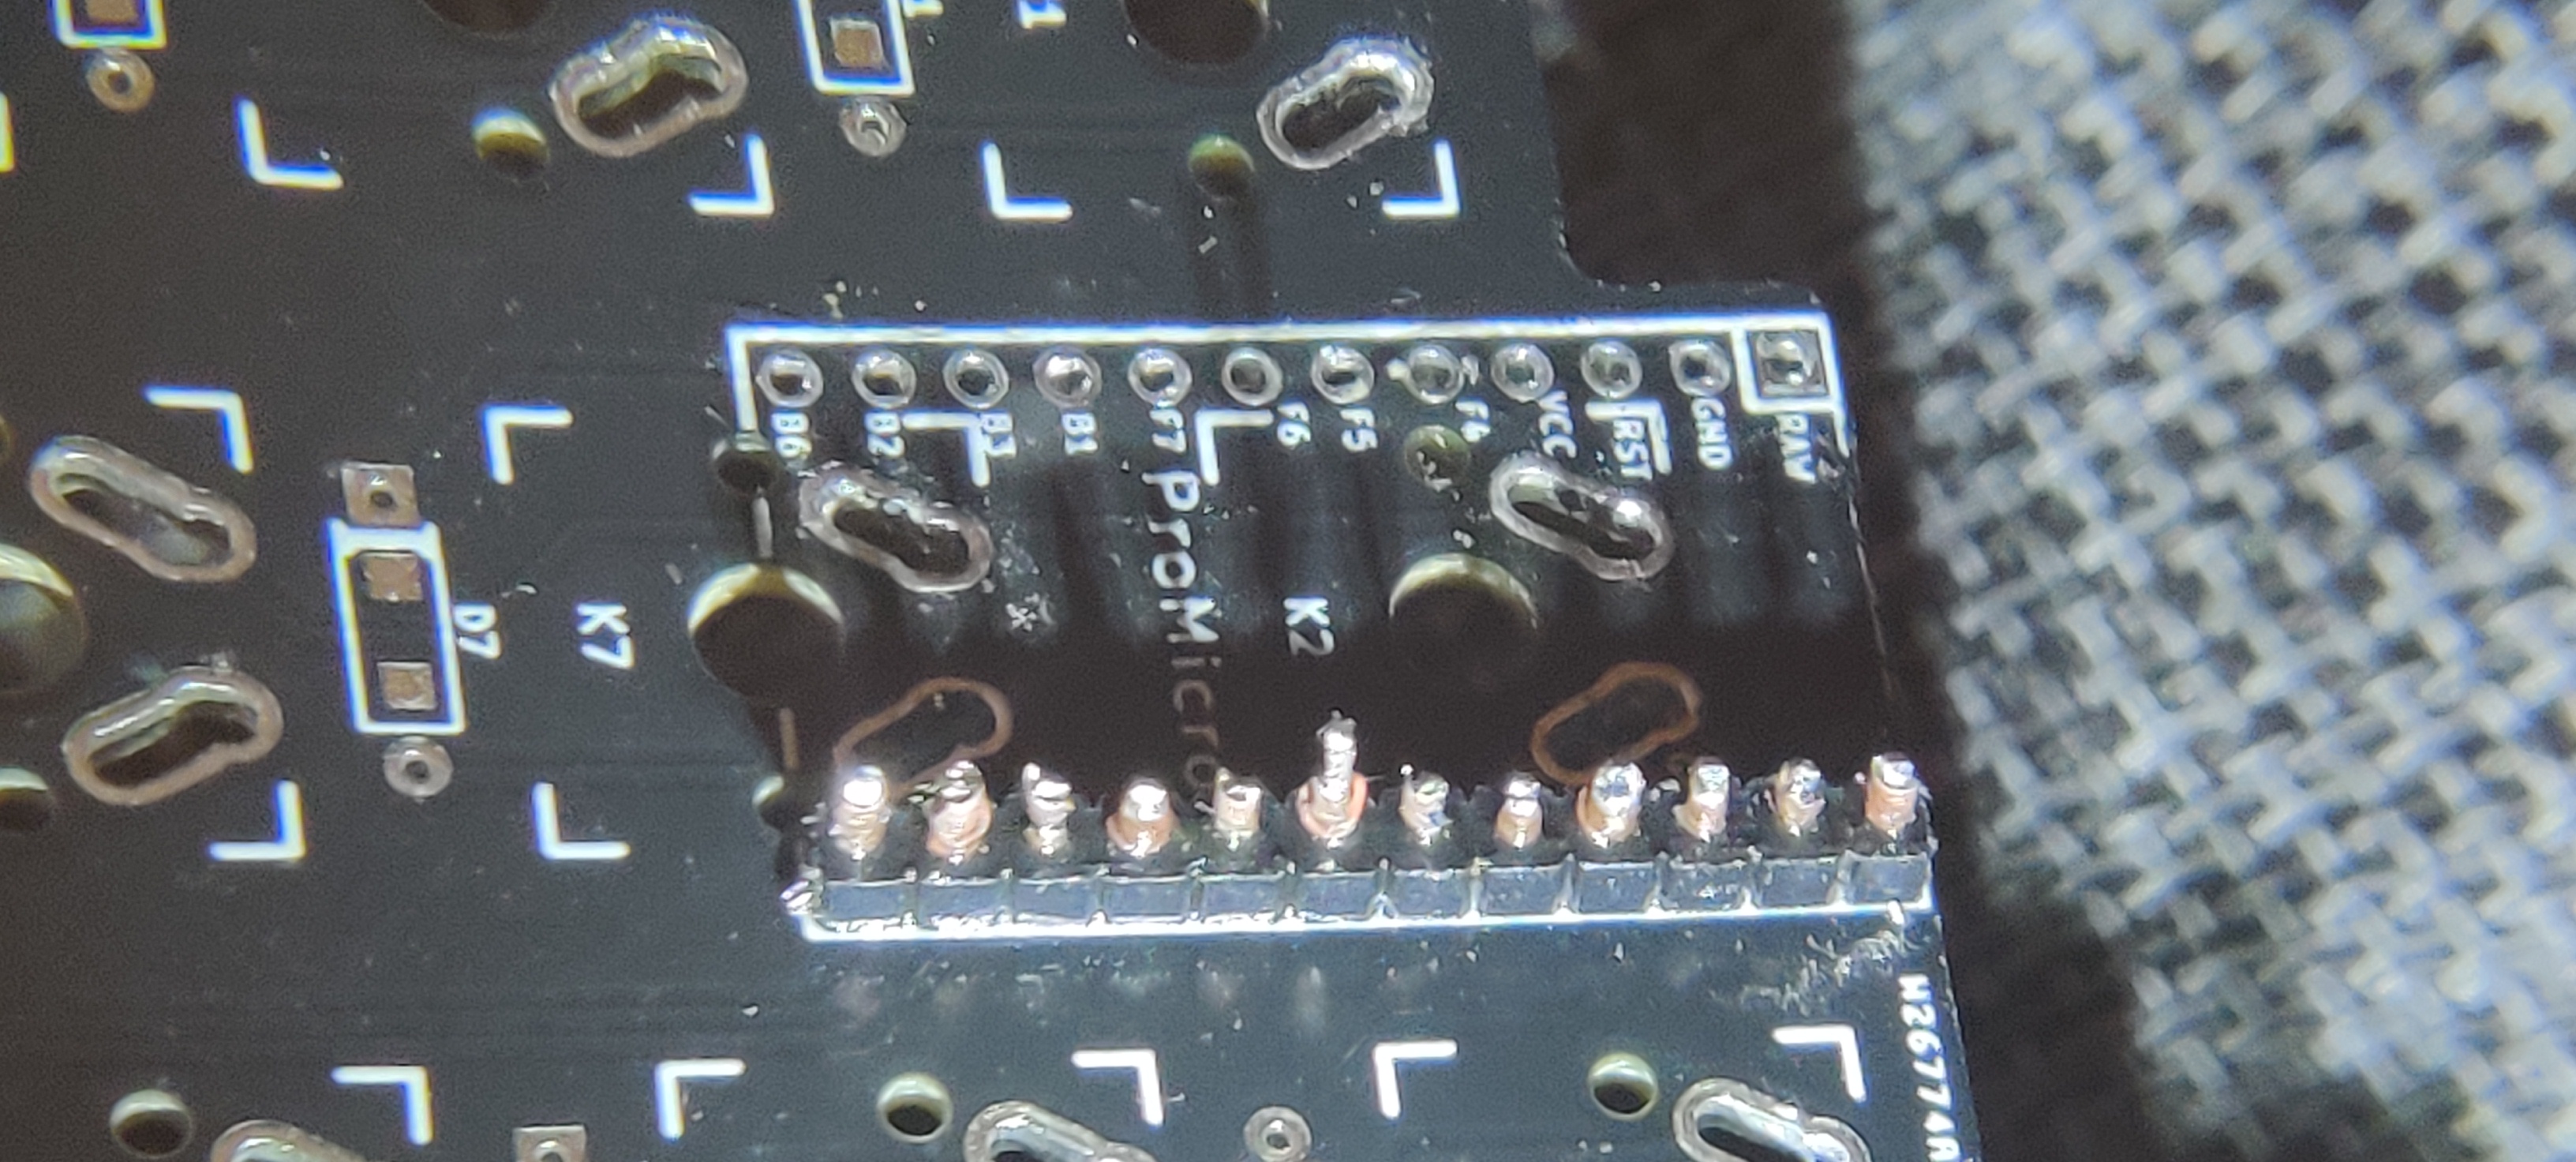
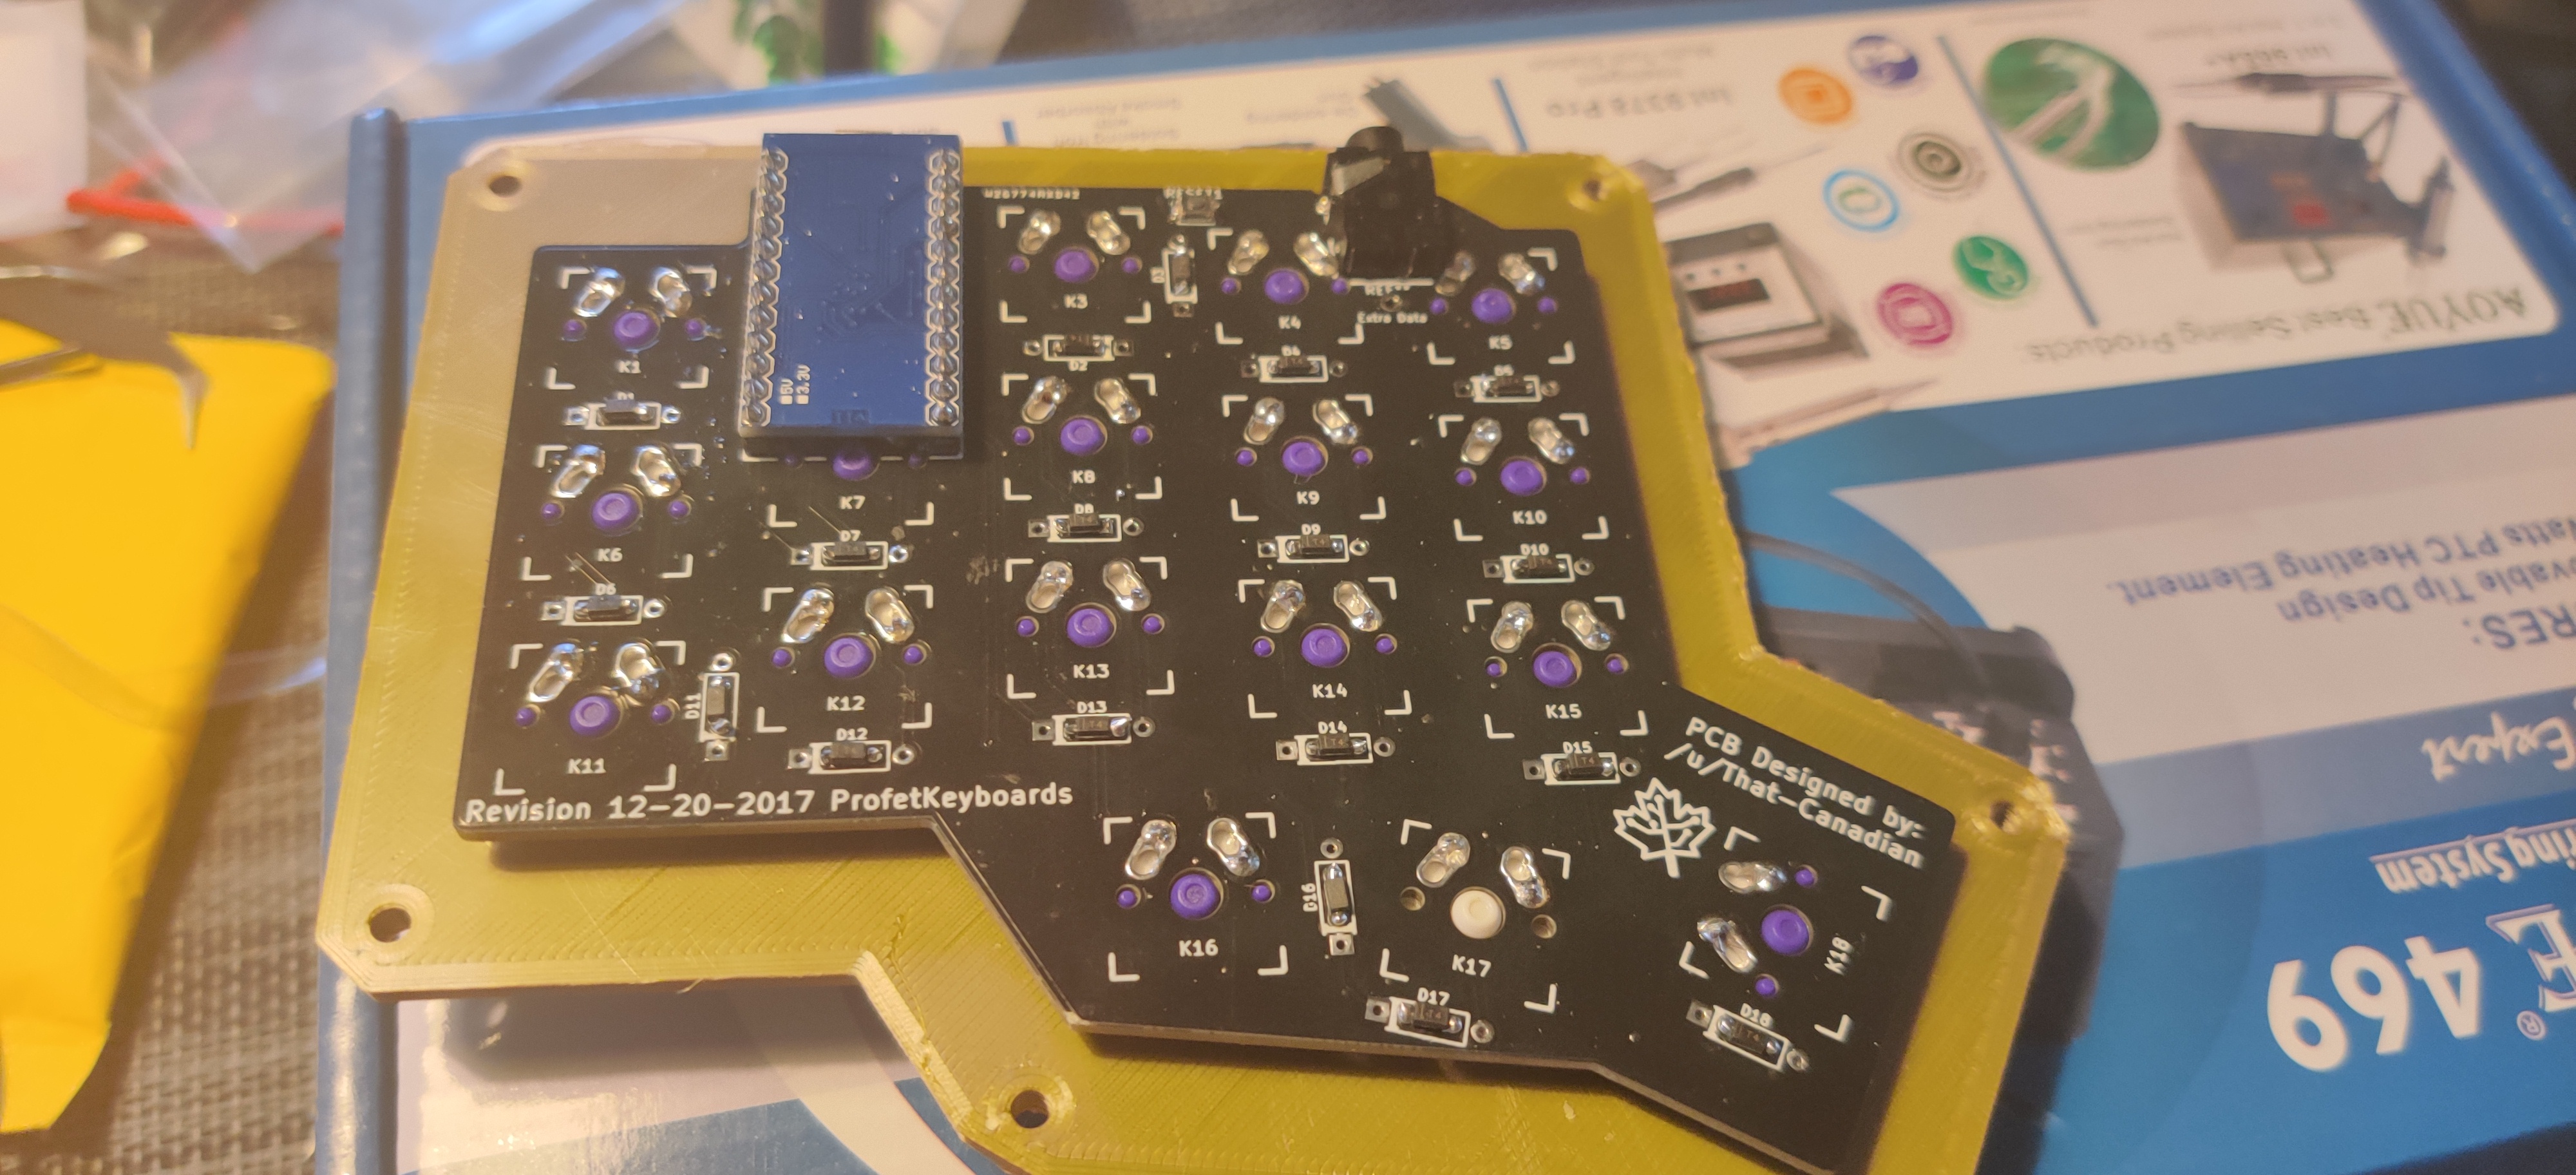
At this point, everything is flashed and ready to go. I even have some switches installed on the case and the controller. I have enough connected to connect the two boards and see if all the keys work. The dream is that everything works on the first try, and I won’t have to desolder anything. I was so wrong. Whenever I connected the two boards with the TRRS jacks, both boards would shut off. Long story short, after a lot of troubleshooting and desoldering the right side PCB not once but TWICE!!! The error could have been avoided if I just read the manual.

Suppose you decide to build your own mechanical keyboard. In that case, I am sending you all the good vibes that you never have to remove the Pro Micro, at least not for troubleshooting reasons. Isn’t this the ugliest thing you’ve ever seen?
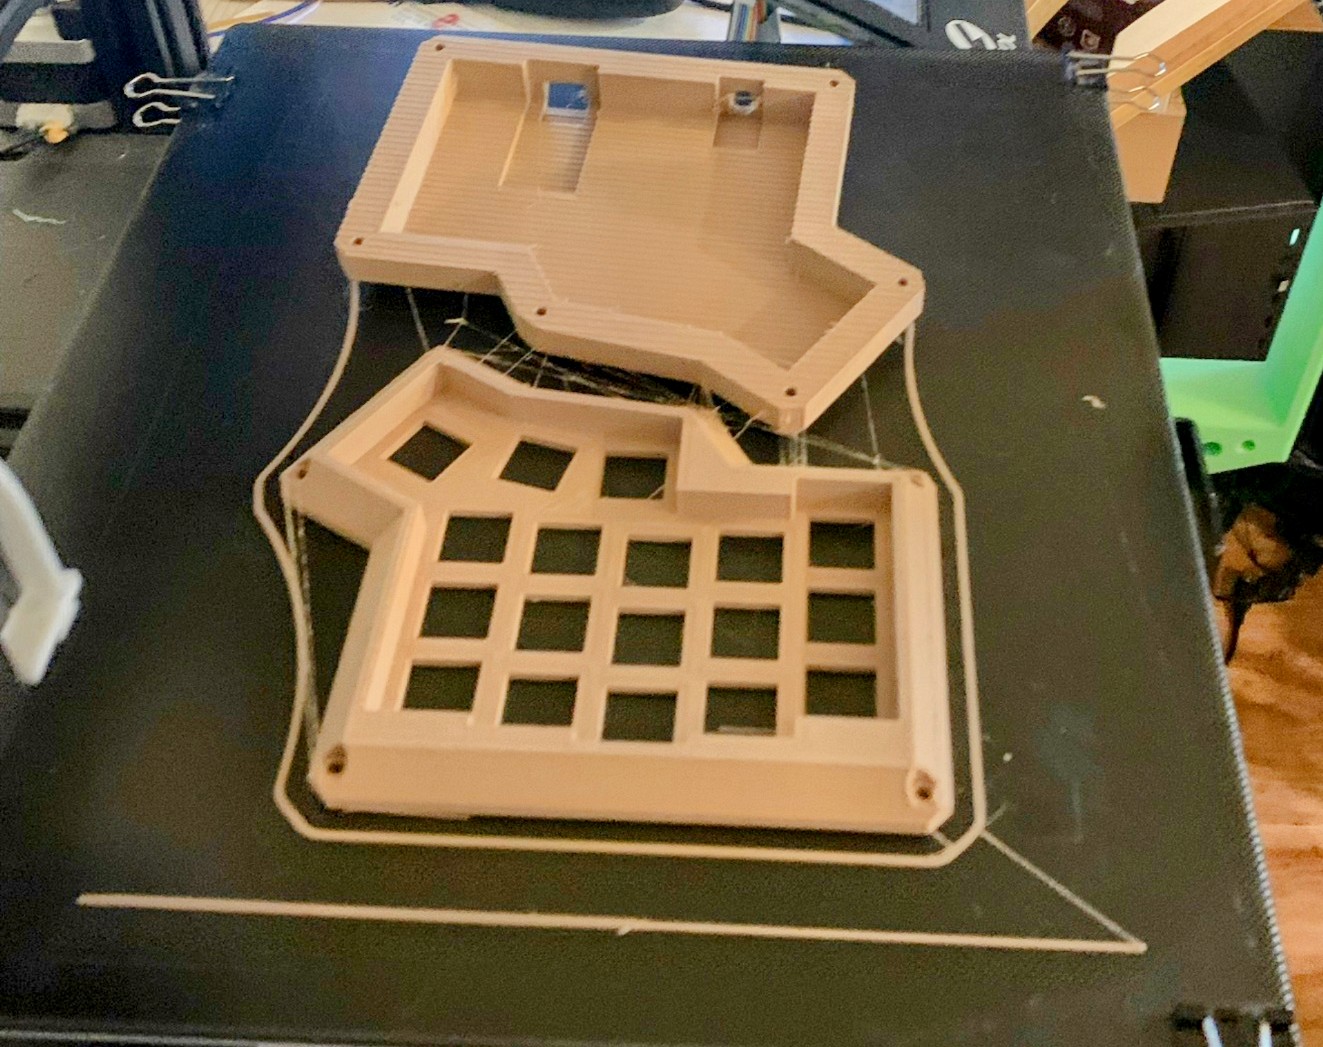
Quick note on cases
My father-in-law was kind enough to spare his time and material to print the case for my first build. That is very awesome of him. The case was linked earlier, but shout out to designers willing to share your awesome designs with the community.
Minor spoiler, but in case you don’t have access to a 3D printer, you can use Treat Stock to order 3D prints. I don’t have any affiliate links or sponsors. I used the service and think it’s a neat option. Treat Stock gives you access to a vast list of printers. Think of it like Etsy for 3D prints. This allows you to select whatever color and materials are available.
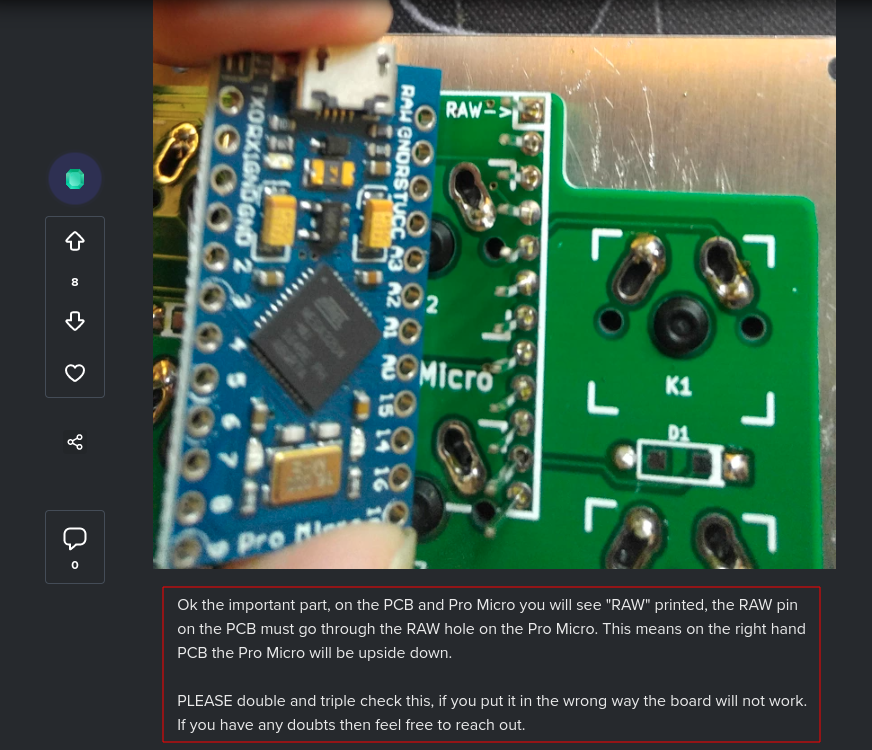
Read the FU***** manual
Back to my reading the manual thought. After reading the build guide and soldering 30 diodes, I got too confident. So much so that I looked at the build guide but didn’t read the not-so-fine print but rather the large print. The right-side controller has to be installed upside down because these PCBs are reversible. I can only blame myself. Just look at this screengrab from the actual build guide.
When I was desoldering the Pro Micro not once but TWICE, I seriously thought about quitting on this project. At this point it was getting spendy and time consuming. A veteran of building keyboards could probably put this together in under an hour. I was easily over two weekends on this. I pushed through, desoldered the Pro Micro, and soldered everything back into place.
The sweet feeling of success
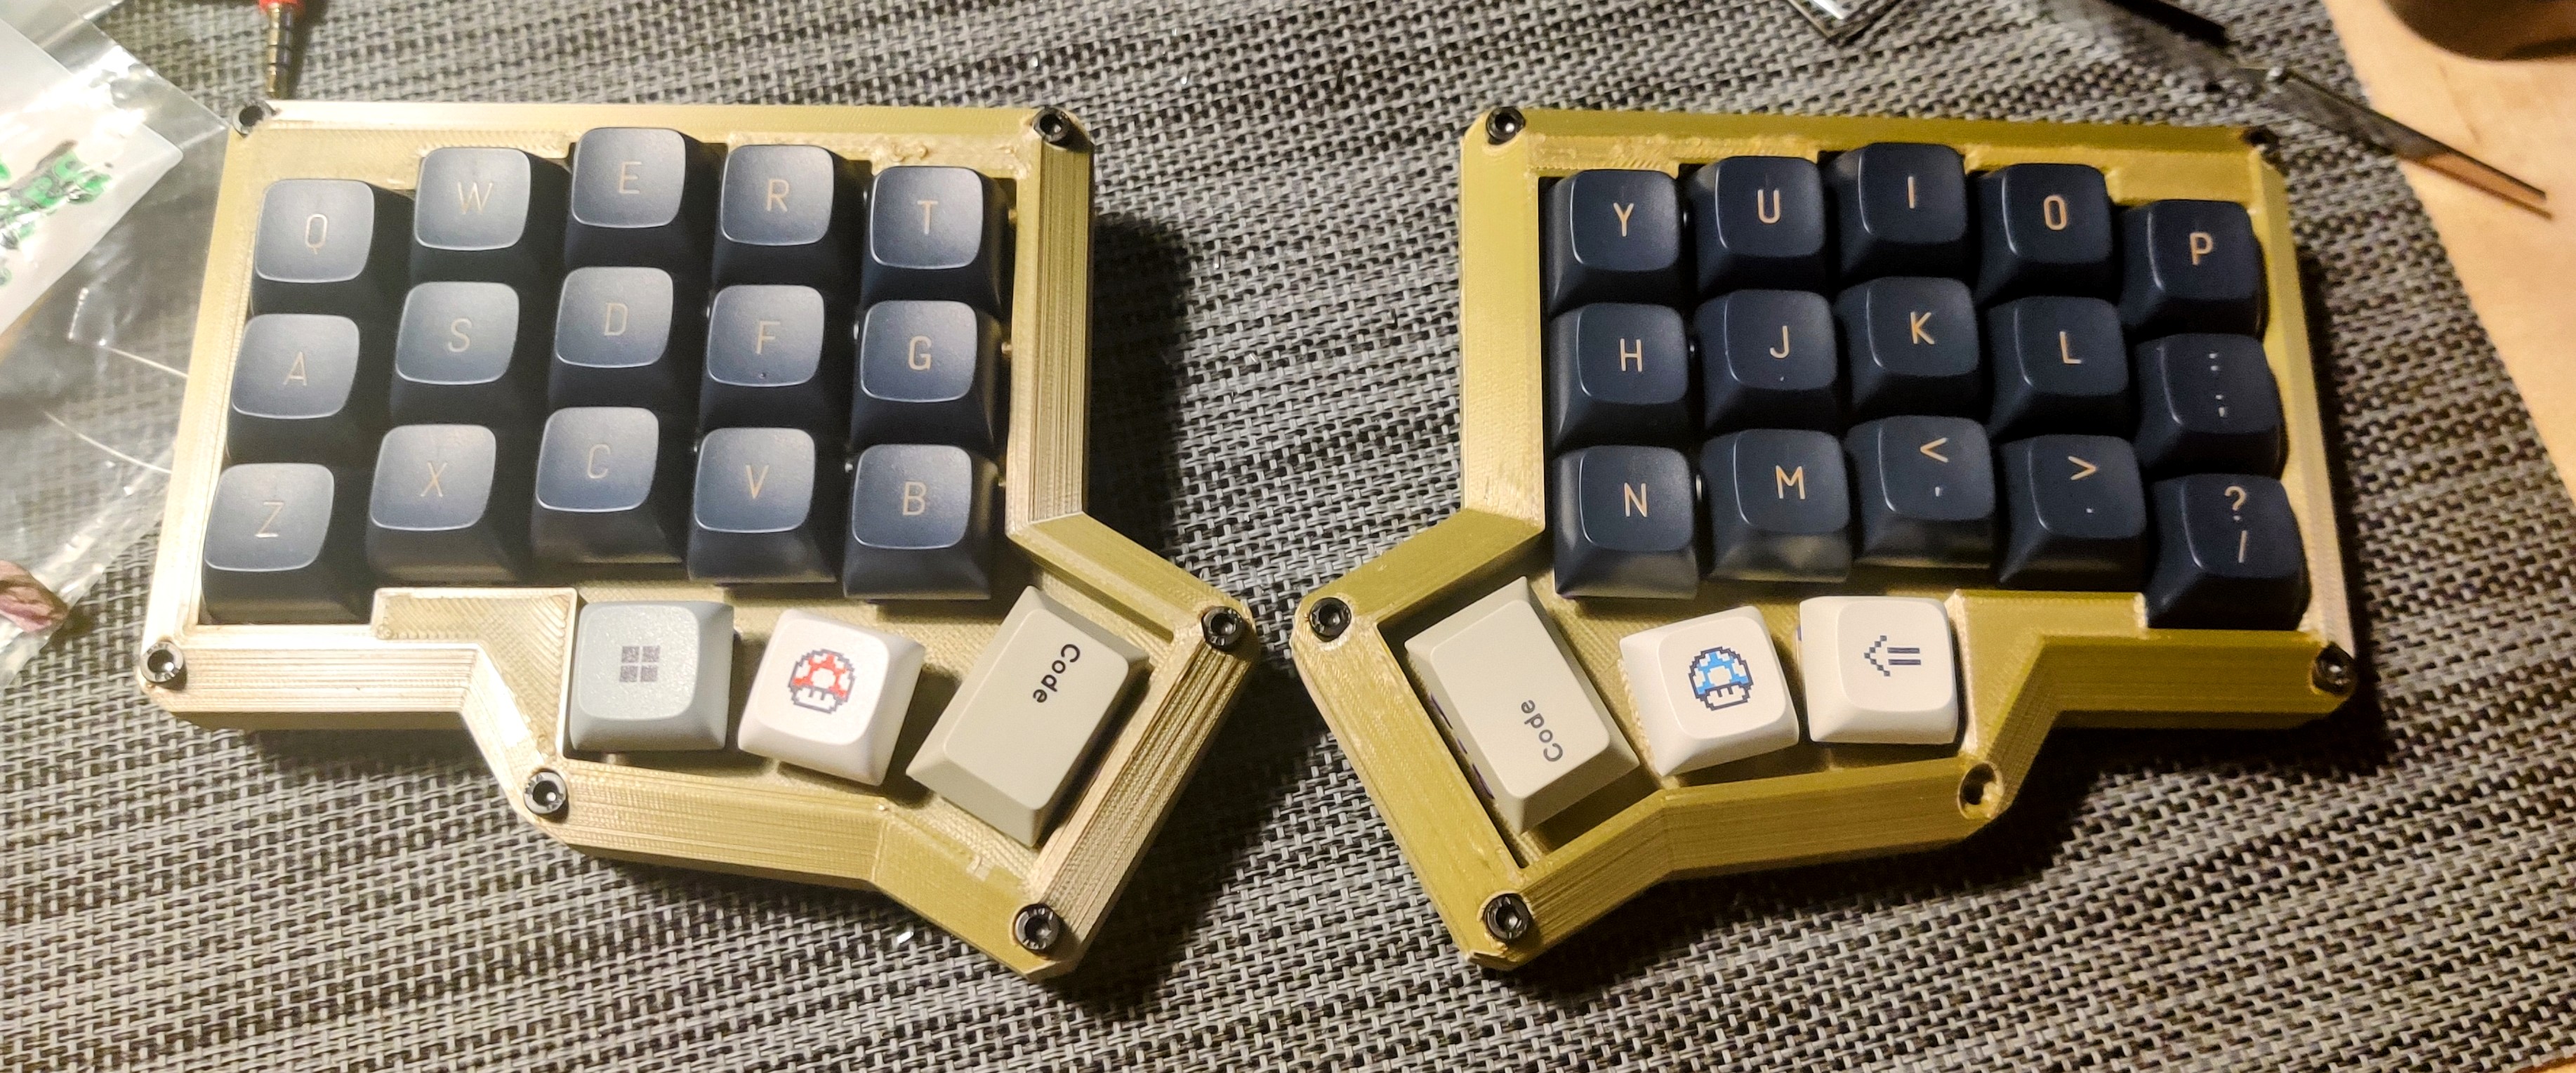
Once everything was back in place, it was time to test again. Although the step back at the time seemed insurmountable, it was now just a funny memory of the past. Seeing it all work is a beautiful thing.
Would I do it again
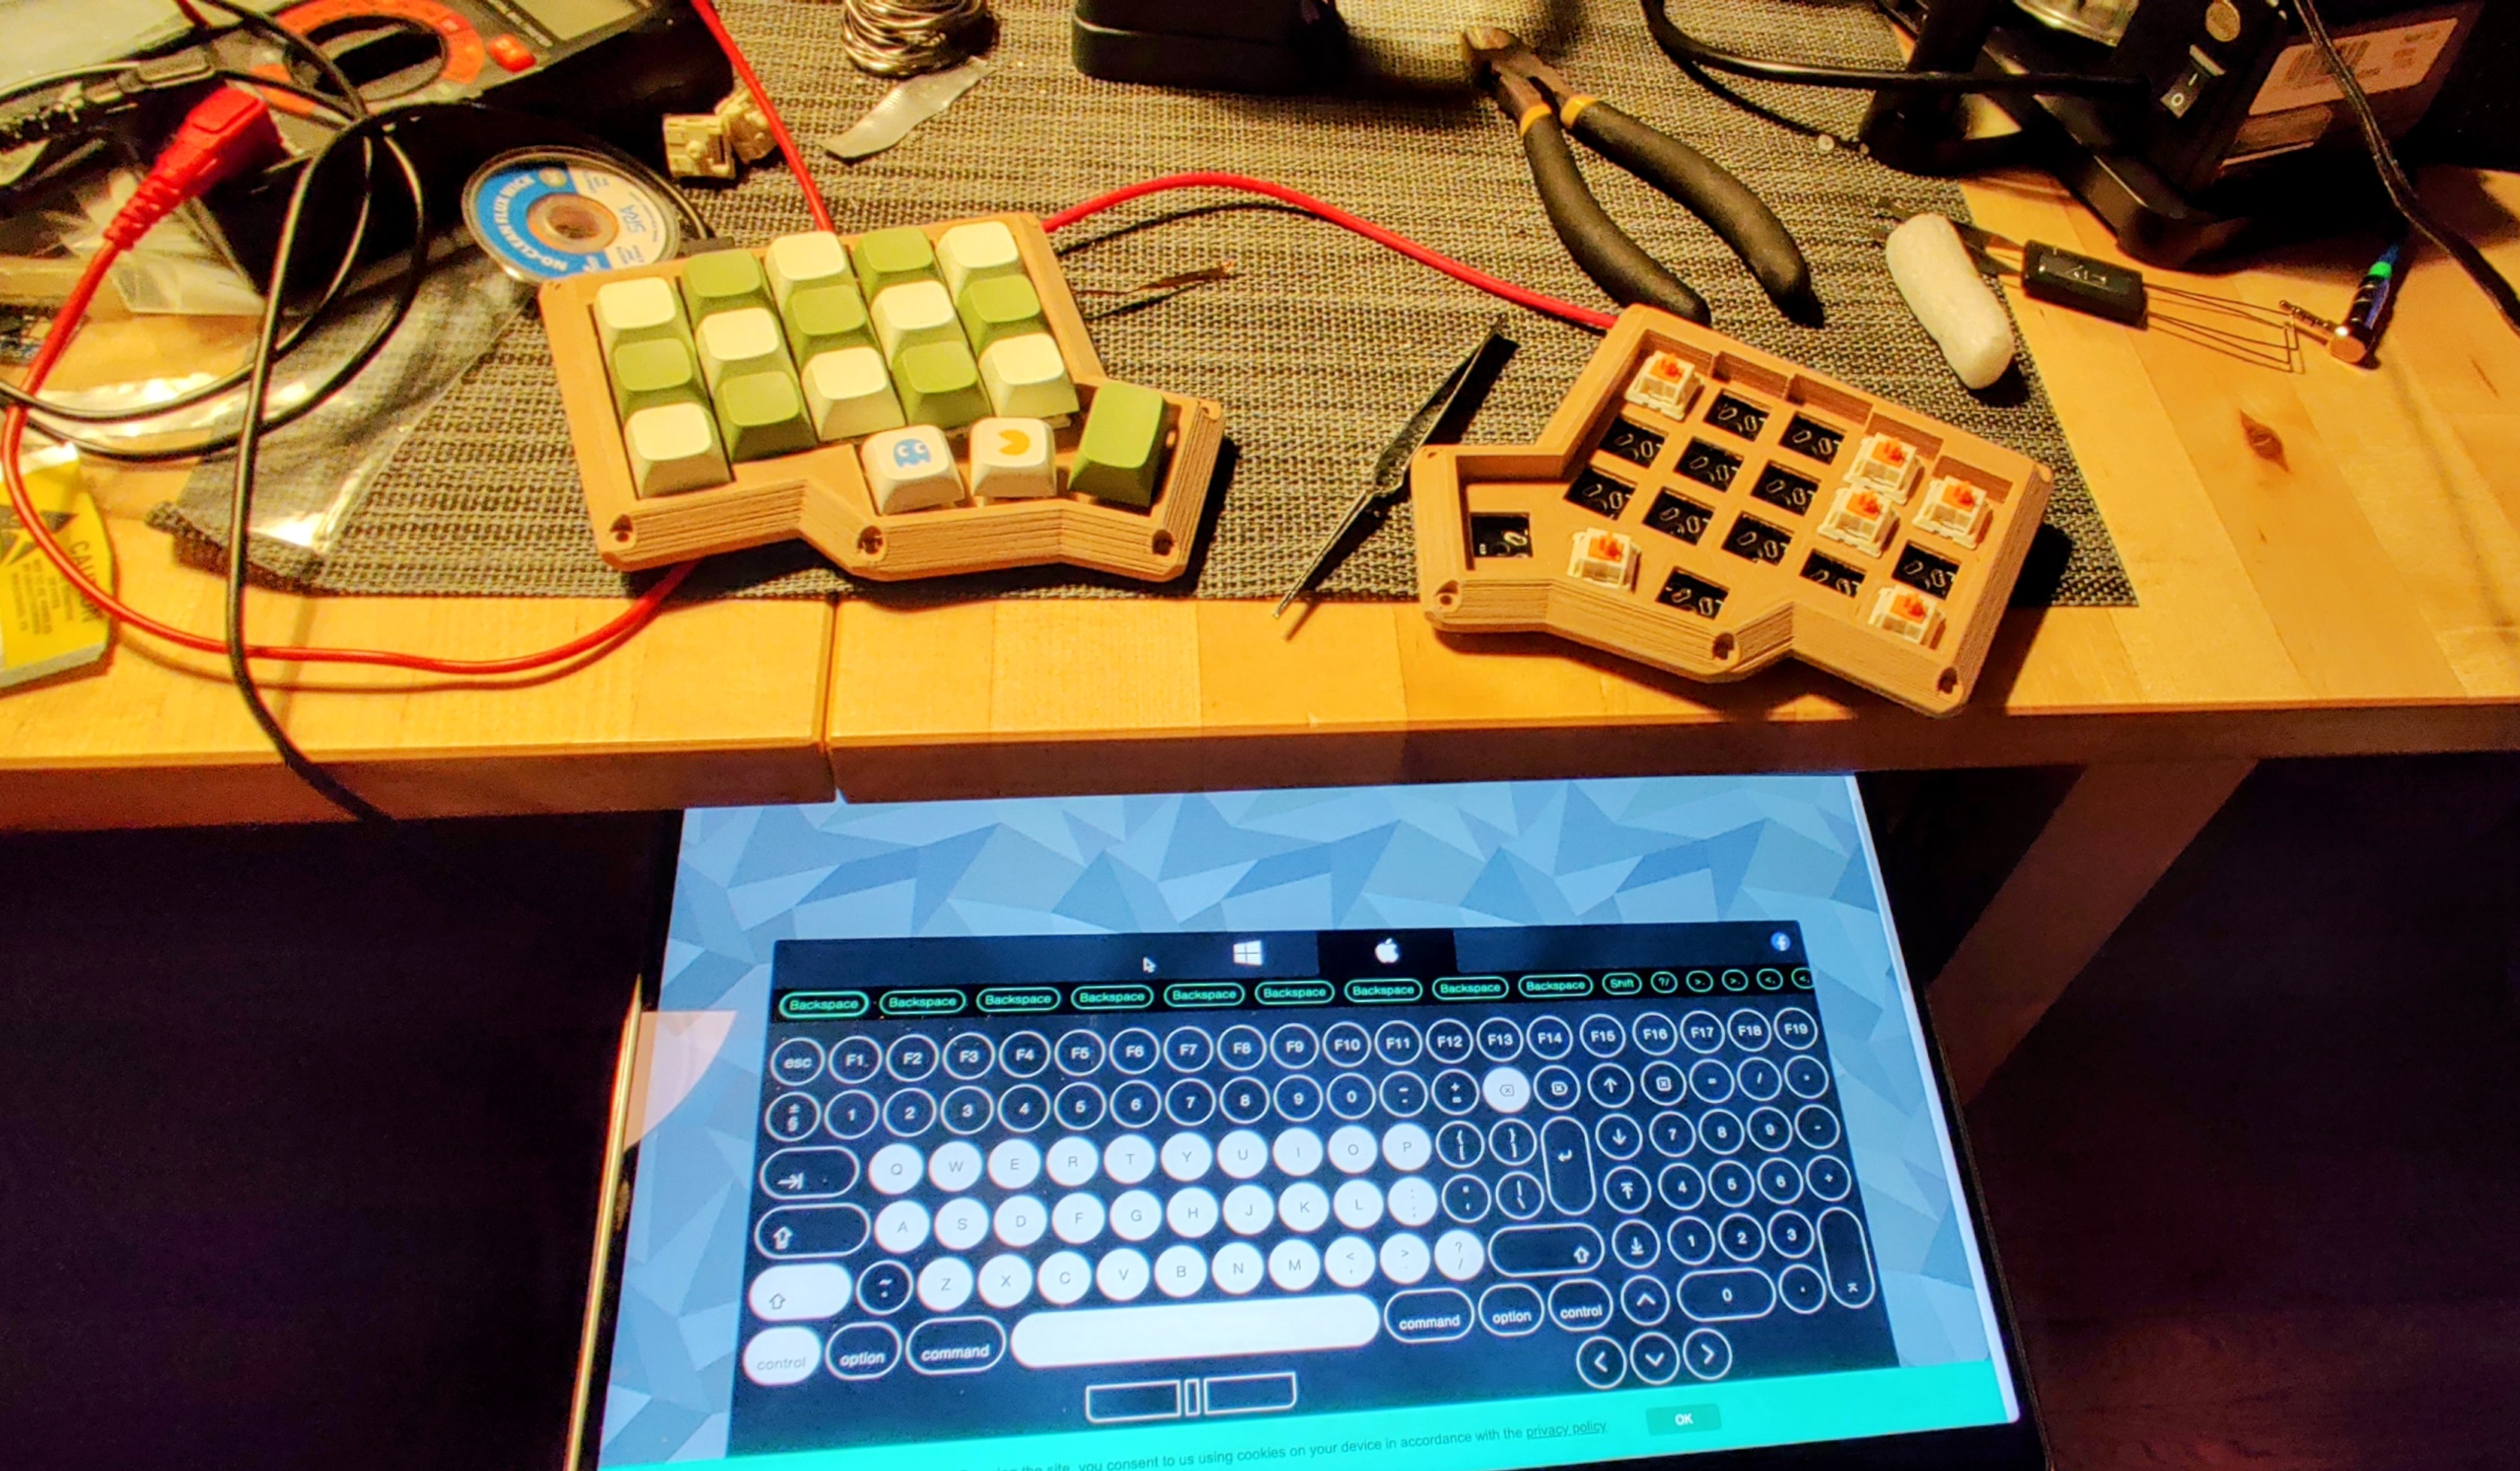
Oddly enough, I had so much fun with the build that I completed the second one in a day or so, this time with no Pro Micro issues!
I used the Keyboard PE switch pads only on the second build. I cut out three neoprene foam layers to fill the case and improve the sound. If anyone is curious about a sound test, please let me know. I can always update the blog with a small audio clip.
Pro Micro is installed correctly on the right side :). I used Azure dragon V2 switches on the second build.
The case for the second build was ordered through Treat Stock in bronze PLA.
Outro
Thank you all for reading this far. It really means a lot. Stepping into the world of mechanical keyboards has been fun. I’ll make at least one more Minidox in the future, and after that, who knows. So let me know what you think, and stay safe out there.
- Featured image by Kirk Lai
- List of split keyboards