6 minutes
Building a Network CI/CD Pipeline Part 2
Introduction
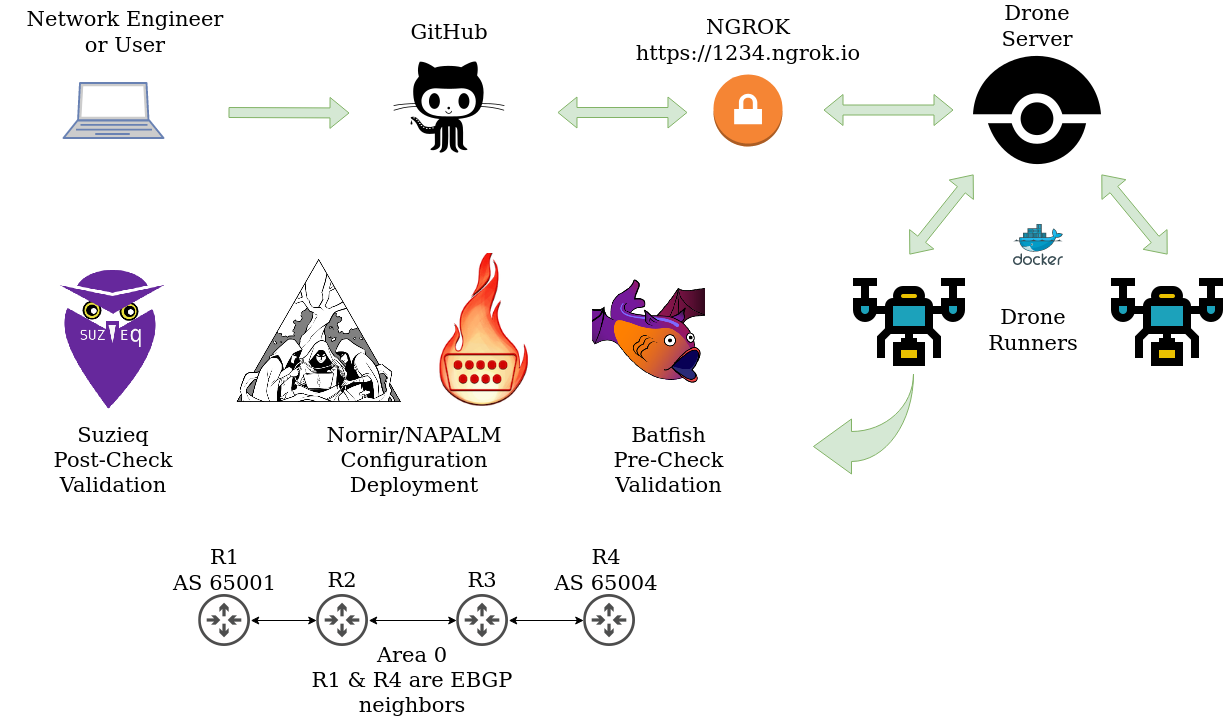
Thank you for checking out part two of this series. The last post went through installing docker on an Ubuntu server to begin our journey to building a CI/CD pipeline. In this post it will be all about connecting Drone to our code repository, in this case GitHub. From our reference diagram below, we will be focusing on the connections from GitHub to the Drone runners.
The Pipeline Server and Runners
Now that we have docker installed, we need something to test our code or execute it. This is one of the main pieces of CI/CD. There are many tools out there that can perform this function. Some of them are Jenkins, Drone, Travis CI, and many more. In this case I went with Drone. Simply because it was new to me and I wanted to play with it. The Drone server interacts with your source control of choice, in my case GitHub. The Drone server and runners can be installed as containers. The runners are actually executing your pipelines. This could be code linting, testing, and deployment of configurations.
One of the neat things about drone is that each runner is an isolated container environment. For example if we wanted to run a pipeline using a python based app, we could pull down a python image and run that as our execution container. Or maybe we are testing some powershell and needed a windows execution environment, we could pull down that image. Once the runners are done with their job, they are destroyed and leave nothing to cleanup.
Why NGROK?
From the diagram above you may have seen NGROK and thought, “what the heck is that?”. Since we will be integrating GitHub with Drone, GitHub needs a public URL or address to hit when making webhook calls to the Drone server. This is more than suitable for our testing purposes. NGROK will form a secure tunnel between your node and their service. All requests that hit this URL will then be forwarded to your application or web server for example. Please note NGROK has free and paid versions. The free version is more than what we need for testing.
Installing NGROK
Login to Ubuntu Server and run the following commands:
mkdir temp && cd temp
wget https://bin.equinox.io/c/4VmDzA7iaHb/ngrok-stable-linux-amd64.zip
sudo apt install unzip
unzip ngrok-stable-linux-amd64.zip
./ngrok http 80
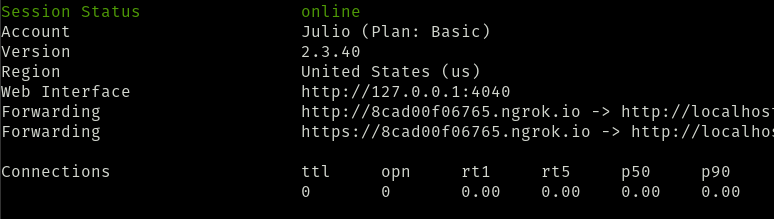
At this point you will see some output similar to below. I didn’t see an option to run NGROK detached, so in the meantime leave this running and connect to the server on another session. Save these URLs as they will be used to build an OAuth application on GitHub.
Creating GitHub OAuth Application
Login to GitHub account and go to Settings > Developer Settings > OAuth apps. From there click on the “”New OAuth App” icon.

Remember that URL we had to note down a while ago? Go ahead and fill in the info, example below as reference.
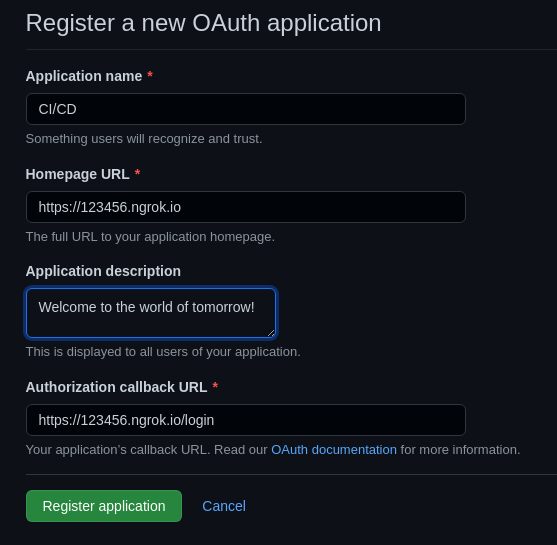
After clicking on “Register application”, click on “Generate a new client secret”. Write down or save those values somewhere. You will need them when setting up the drone server. Please note, if you restart the NGROK service, a new URL will be generated and you will have to update your OAuth application with that URL.
Installing Drone Server
One more credential needs to be created, the shared secret (RPC_SECRET) between the drone server and runners. Execute the command below from the Ubuntu server.
Example from drone.io
$ openssl rand -hex 16
bea26a2221fd8090ea38720fc445eca6
docker pull drone/drone:2
docker run \
  --volume=/var/lib/drone:/data \
  --env=DRONE_GITHUB_CLIENT_ID={{DRONE_GITHUB_CLIENT_ID}} \
  --env=DRONE_GITHUB_CLIENT_SECRET={{DRONE_GITHUB_CLIENT_SECRET}} \
  --env=DRONE_RPC_SECRET={{DRONE_RPC_SECRET}} \
  --env=DRONE_SERVER_HOST={{123456.ngrok.io}} \
  --env=DRONE_SERVER_PROTO=https \
  --env=DRONE_USER_CREATE=username:{{GitHub Username}},admin:true \
  --publish=80:80 \
  --publish=443:443 \
  --restart=always \
  --detach=true \
  --name=drone \
  drone/drone:2
Feel free to set environment variables or just replace the {{}} settings with the values you have gathered so far. If you want a more in depth breakdown of all the variables, please check out the Drone docs!
Installing Drone Runners
The runners are interesting, there’s a few versions of the runners depending on what type of environment you are working with. For example, the exec runner will execute pipelines directly on the host, no isolation provided. Useful if you are in an environment that cant utilize containers. This really didn’t seem like a good idea to me especially as I was testing and destroying things all the time. Drone recommends starting with the docker runner if you are new to Drone and I would echo that. For more info on the Drone runner install, check out their docs!
docker pull drone/drone-runner-docker:1
docker run --detach \
  --volume=/var/run/docker.sock:/var/run/docker.sock \
  --env=DRONE_RPC_PROTO=https \
  --env=DRONE_RPC_HOST={{123456.ngrok.io}} \
  --env=DRONE_RPC_SECRET={{super-duper-secret}} \
  --env=DRONE_RUNNER_CAPACITY=3 \
  --env=DRONE_RUNNER_NAME=my-first-runner \
  --publish=3000:3000 \
  --restart=always \
  --name=runner \
  drone/drone-runner-docker:1
Please note, I had issues when running the dynamic URL and Chrome, if you run into this issue please test with Firefox.
Welcome and Activating a Repository
At this point you should be able to hit your public URL, something like “http://1234567.ngrok.io”. You will be greeted with the Drone welcome page. Feel free to login and authenticate with your GitHub account. Now that you are logged in, you may see something like below.
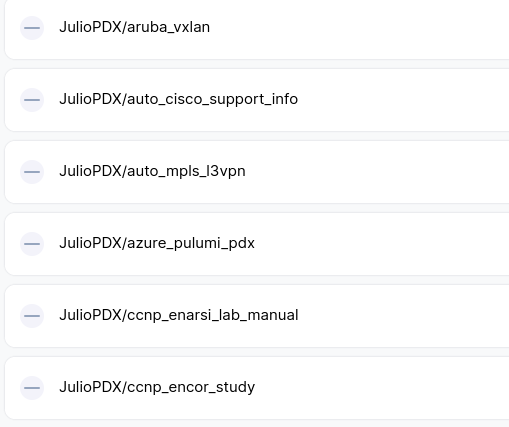
No repositories are active and being synced with Drone. If you already have a repository created, feel free to click on it and then click on “ACTIVATE REPOSITORY”. Something like this will then be displayed.
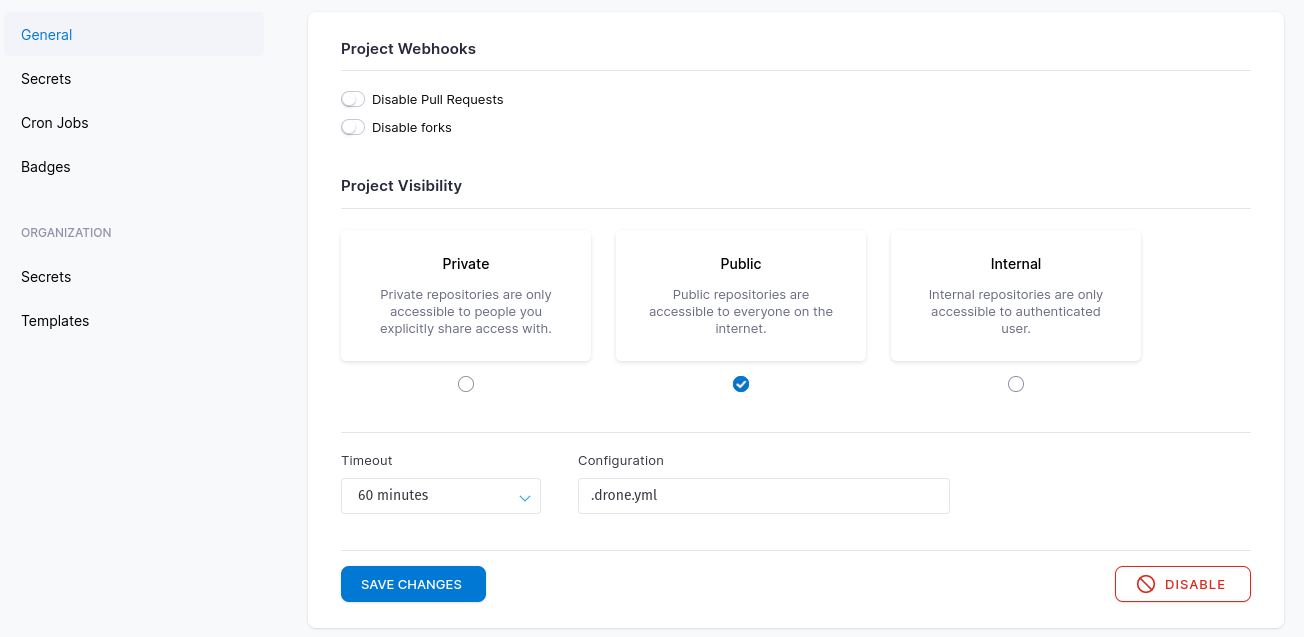
I left my build fairly vanilla but something that would be interesting is cron jobs from the server. Imagine the main or golden config repository is executed everyday at midnight to prevent configuration drift. We will get into the configuration file in a moment. In the meantime head to “Secrets” under organization or under general.
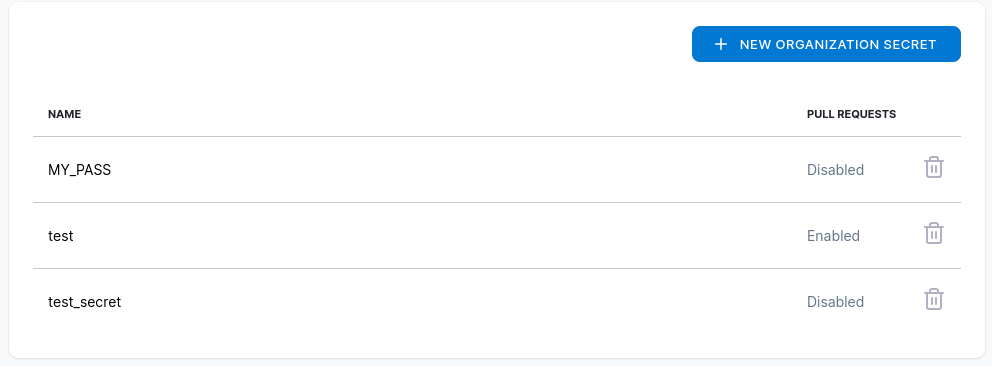
Lets say our script needs to connect to our devices using a key or password. We can set secrets here that can then be utilized by our build environments. In my lab I will be using Arista devices with simple username and password for authentication. The scripts will then look for an environment variable of “MY_PASS”. Go ahead and save changes once you are happy with them. You probably noticed there is a setting for “Configuration” and it is currently set to .drone.yml. Stayed tuned on the next episode of Dragon Ball… wait a minute that’s not this program. Seriously, on the next part I will go over creating a .drone.yml file and creating our very own docker container image!